First peer
Configure a BGP-LS speaker on your router, add it to Prelude TE through the web UI, and verify that the topology populates.
This page takes you through bringing up your first BGP-LS session end-to-end: configuring a router to peer with Prelude TE, declaring the peer in the web UI, and verifying that the topology starts to populate. The whole walkthrough is done from the web UI — no API, no command line.
If you are not yet at this stage, see Installation and Configuration first.
Before you start
Have ready:
- The IP address of the router or route reflector you will peer with.
- The AS number of that router, and the AS number Prelude TE is using locally (set in Settings → BGP in the web UI).
- Administrative access to the router so you can configure a BGP-LS peer pointing back at Prelude TE.
1. Configure BGP-LS on the router
Prelude TE is a passive consumer of BGP-LS. The router does the heavy lifting: it carries the Link-State NLRIs from its IGP and distributes them over a BGP session to Prelude TE.
The exact syntax depends on your vendor. The shape is always:
- An IGP enabled and exporting Link-State information.
- A BGP neighbor pointing at the Prelude TE host's IP address.
- The neighbor configured with the BGP-LS address family (also
called
link-stateorbgp-lsdepending on the platform). - The BGP-LS instance ID set to the same value on every router or route reflector that exports the same IGP — see BGP Peers / Peer redundancy for why this matters.
Vendor-specific recipes are out of scope for this page — refer to your router documentation.
2. Set the local BGP identity
Before adding peers, set the BGP identity Prelude TE will use when opening sessions. From the web UI:
- Open Settings.
- Set the Router ID to an IPv4 address that uniquely identifies this Prelude TE instance on your network.
- Set the Local AS to the AS number your routers will see Prelude TE as.
- Leave Passive mode off unless you specifically want Prelude TE to only accept inbound sessions and never initiate one.
- Save.
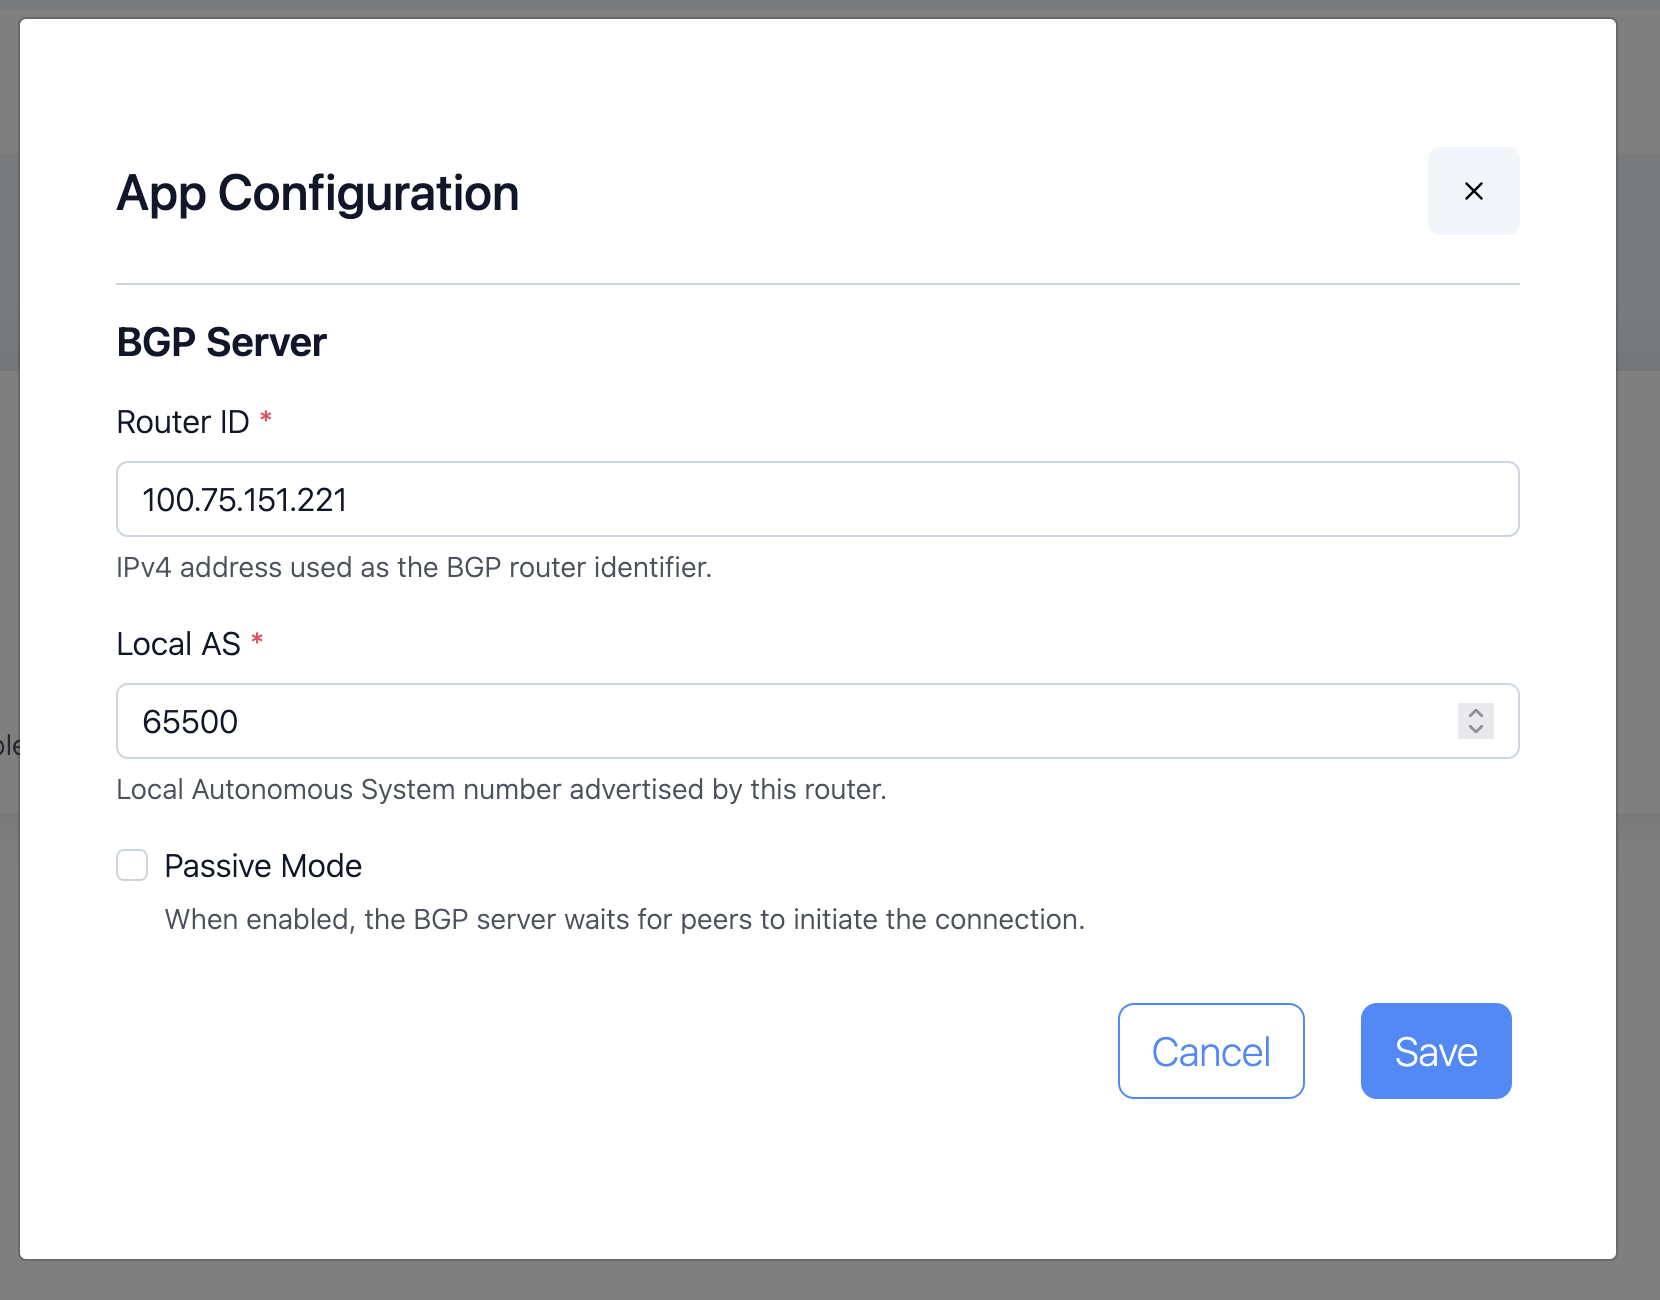
These three values are stored in the database and applied immediately — no restart required.
3. Add the peer in the UI
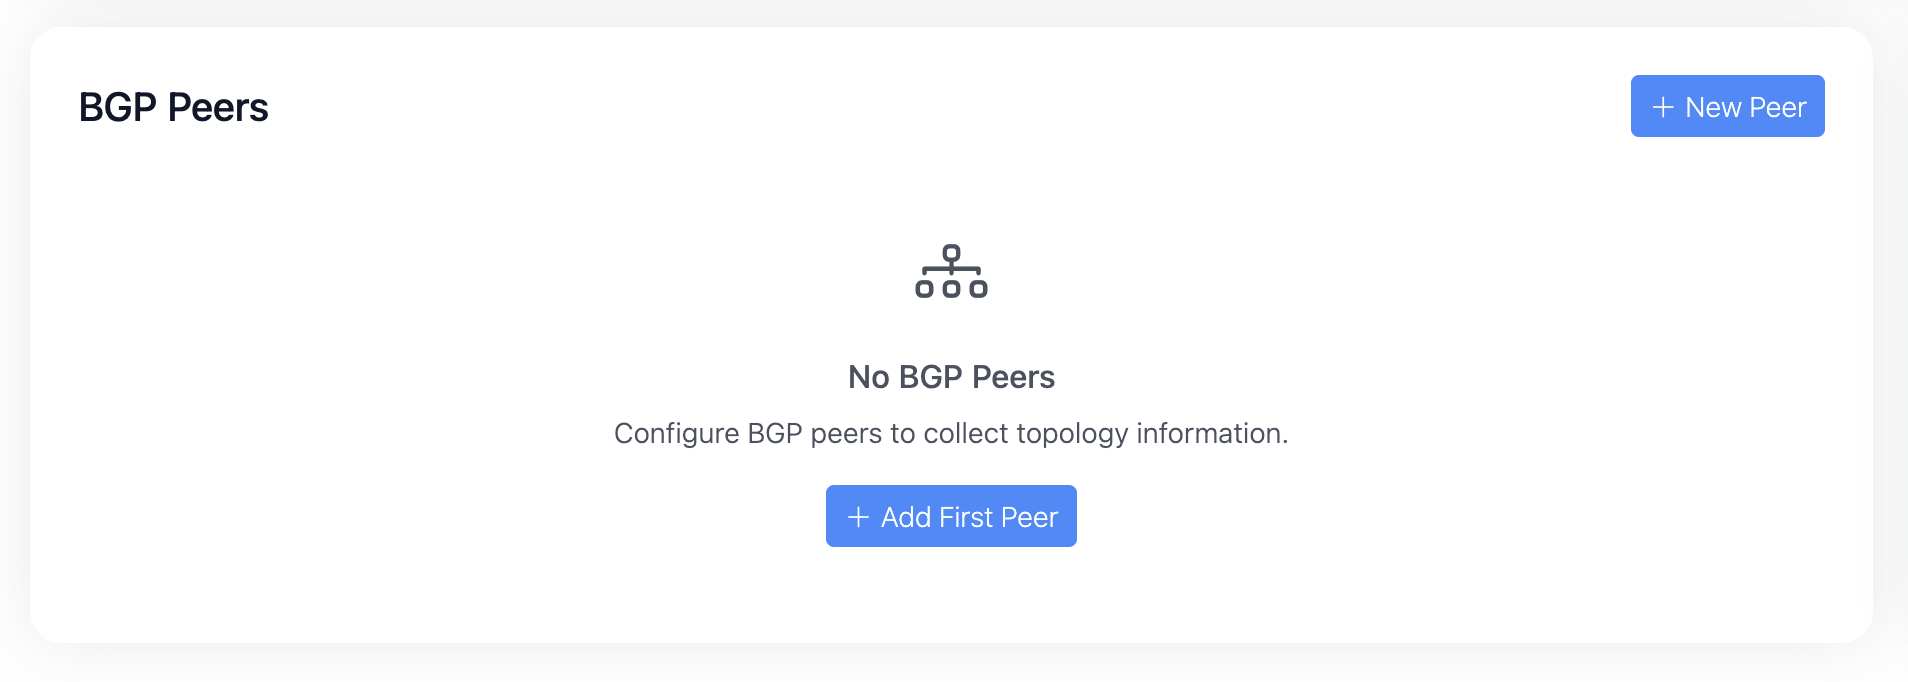
In the left navigation, open Dashboard, then click New peer.
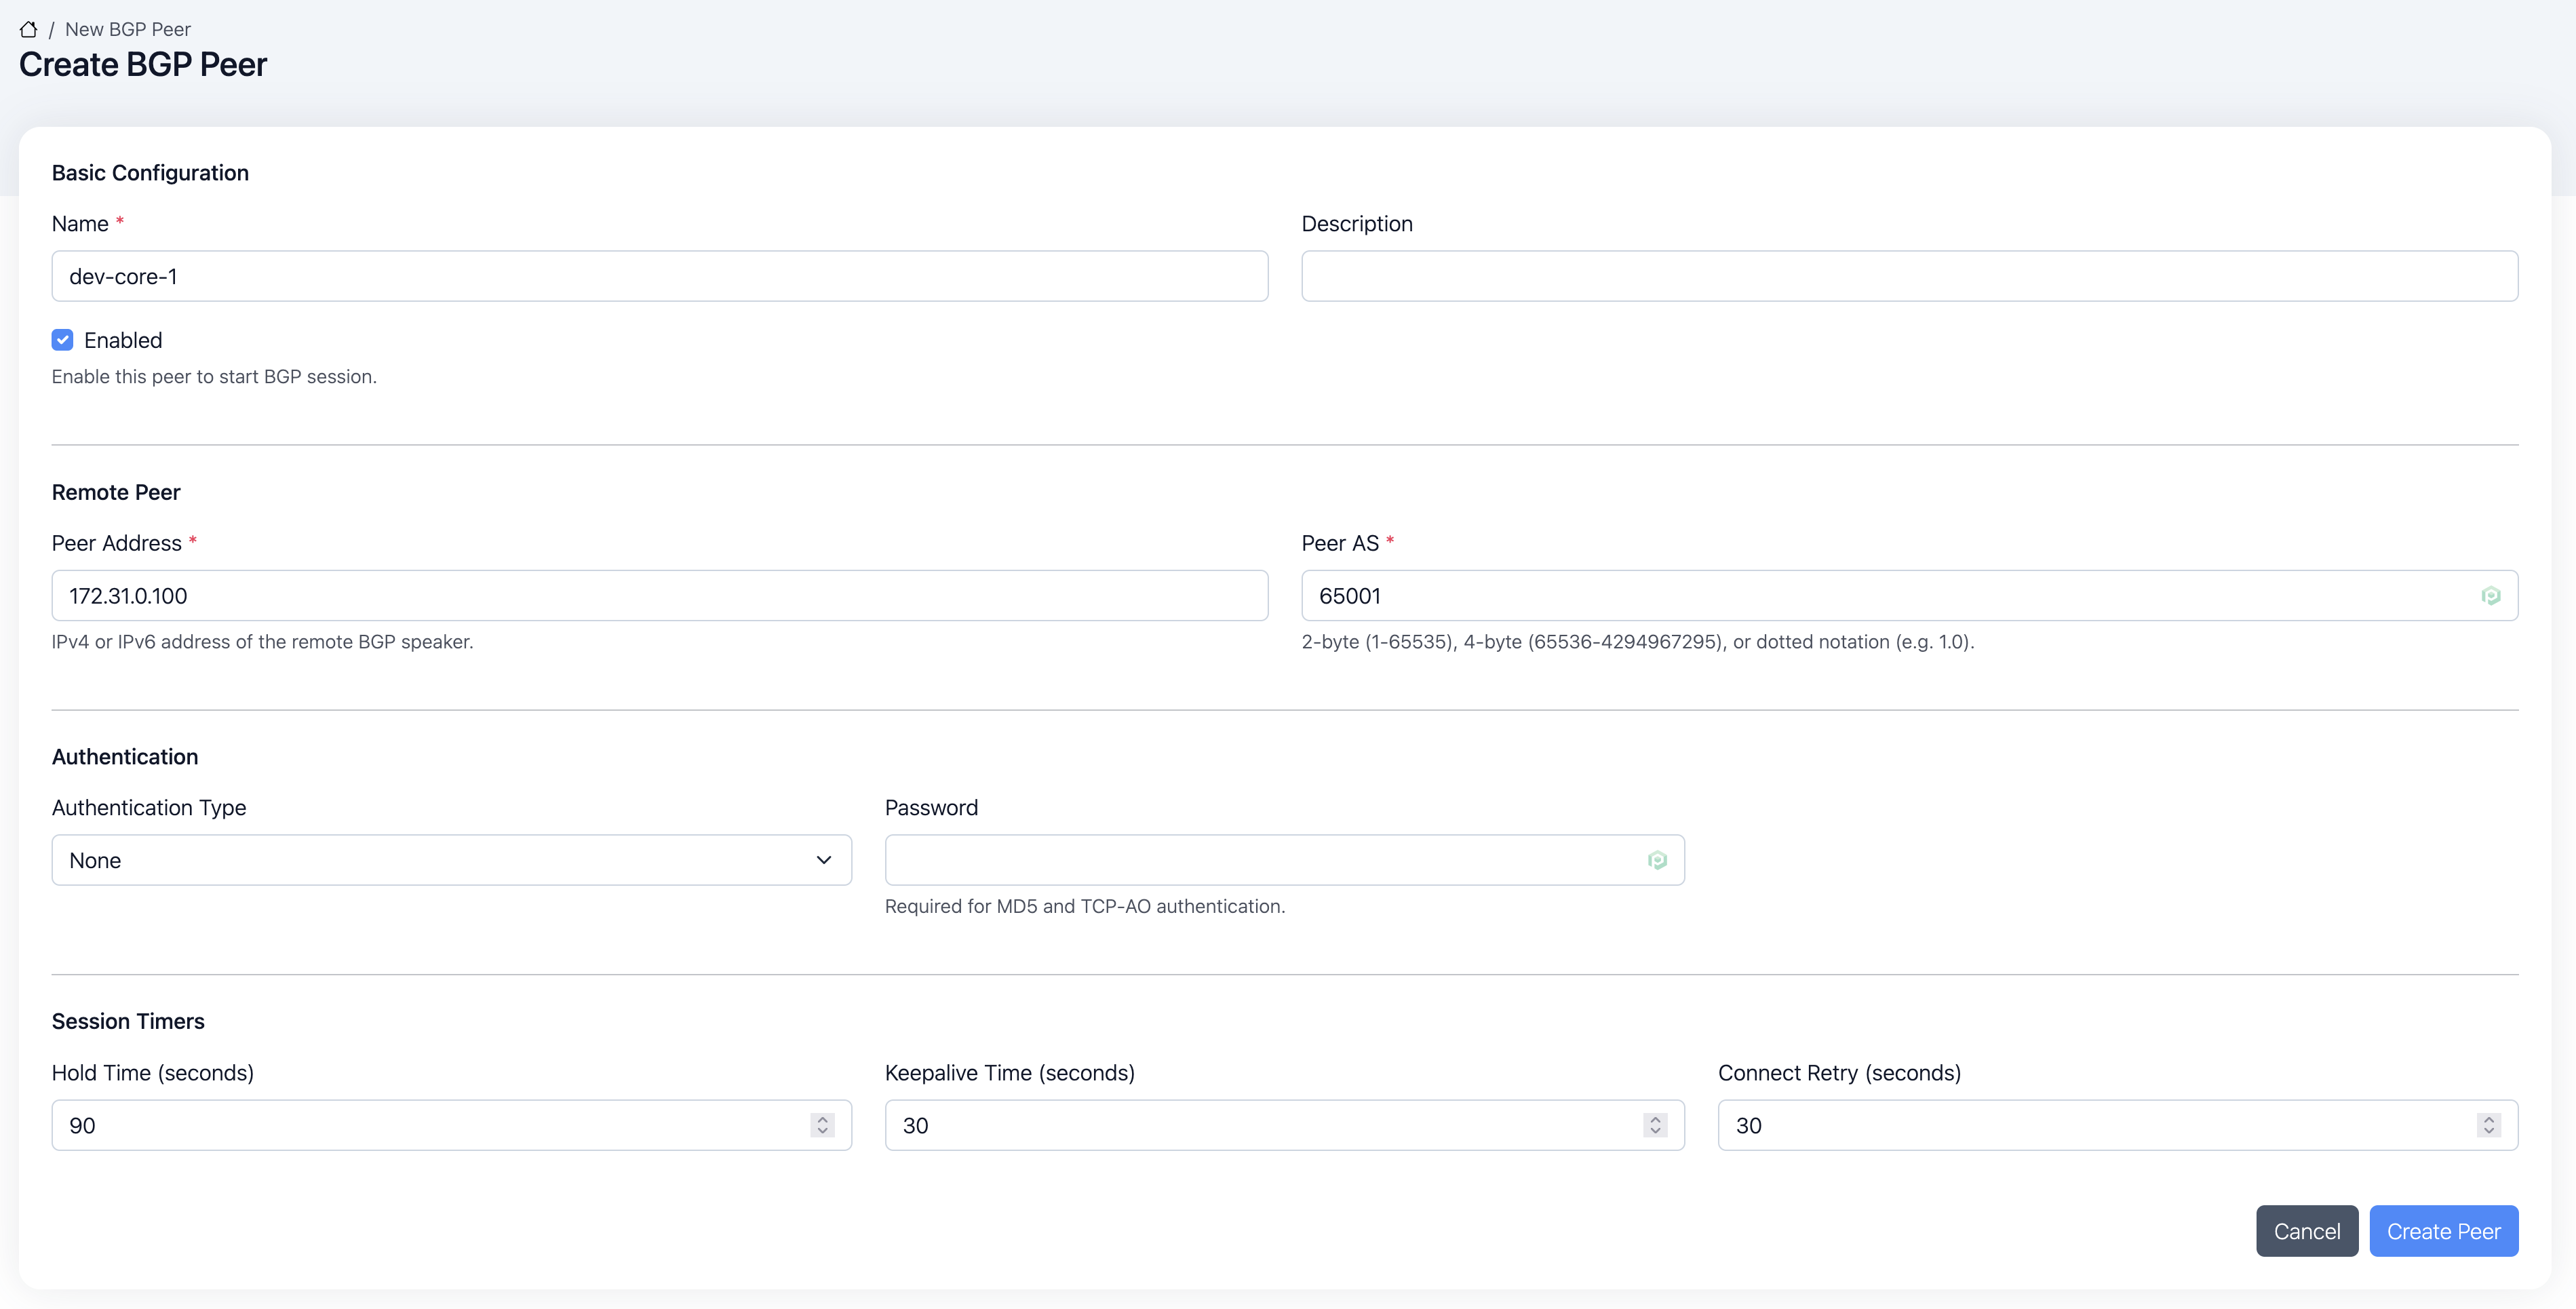
Fill the form with the details for your router or route reflector:
- Name — a friendly label you will recognize in the peers list
(e.g.
core-rr-1). - Description — optional free text.
- Peer address — the router's IP address.
- Peer AS — the router's AS number. Prelude TE accepts 2-byte
plain (
65001), 4-byte plain (4200000001), or dotted notation (1.0). - Authentication — leave None for evaluation. Switch to MD5 for production and set the shared secret. See BGP Peers / Authentication for the details.
- Hold time / Keepalive / Connect retry — leave the defaults (90 s / 30 s / 30 s) unless your network has specific requirements. See BGP Peers / Hold-Keepalive tuning.
- Enabled — leave on so the engine starts the session right away.
Click Save. The new peer appears in the list with its state set
to idle.
4. Watch the session come up
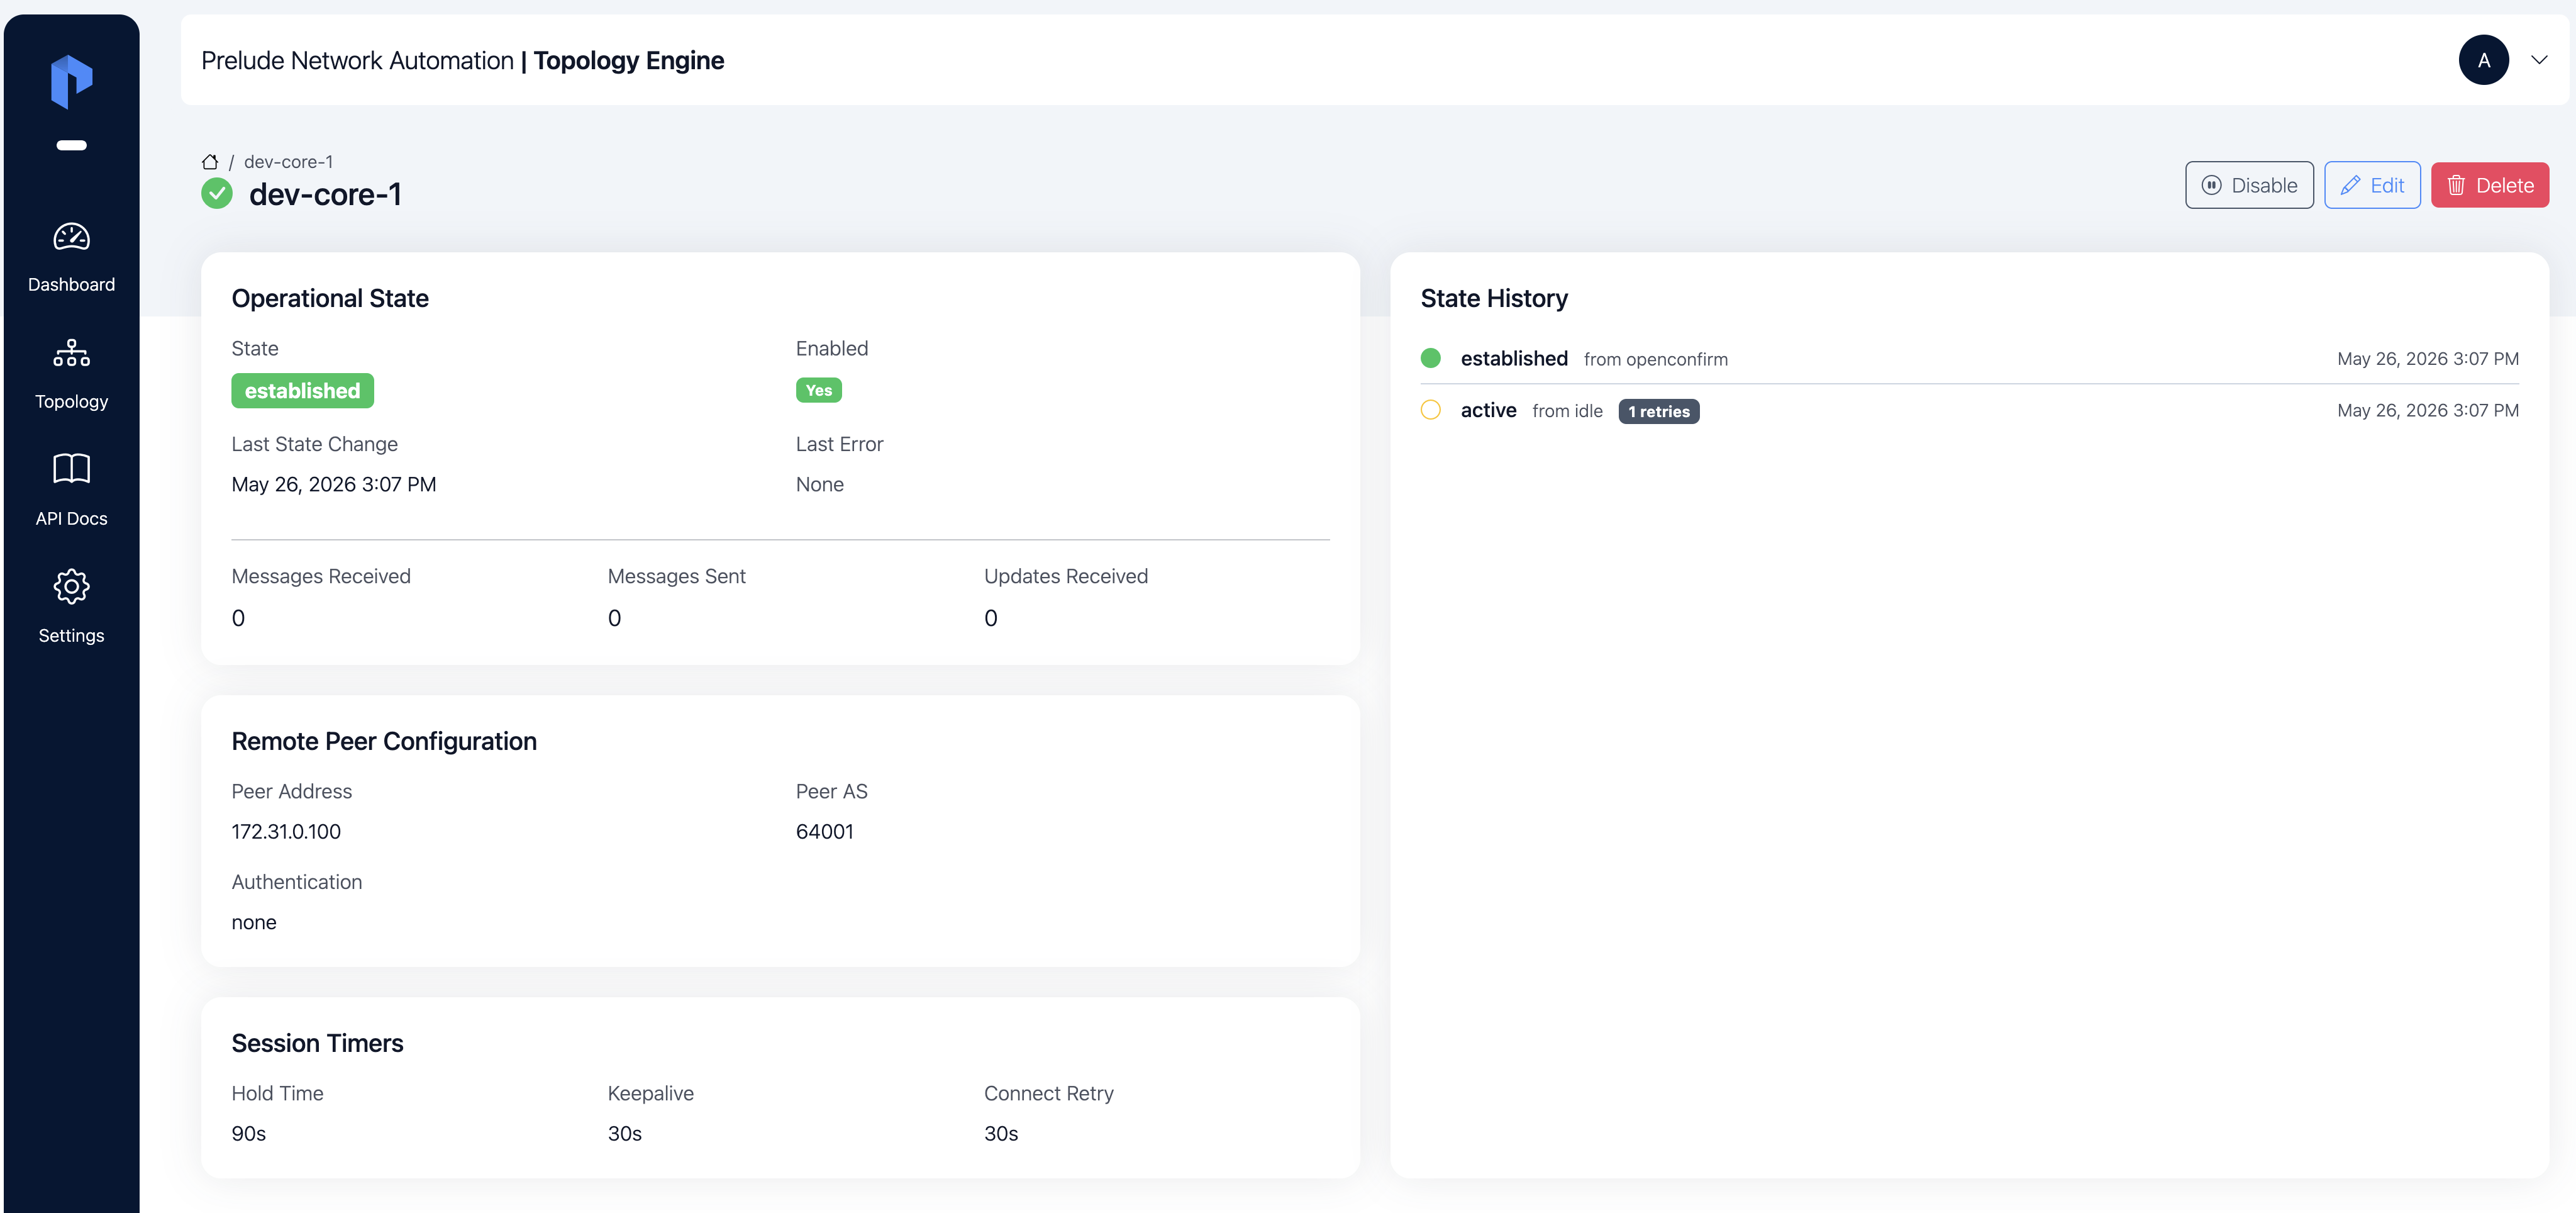
Click the peer's name to open its detail page. You should see its state transitioning through the BGP state machine:
idle → connect → active → opensent → openconfirm → established
When the session reaches established, you are done. The message and update counters start ticking and BGP-LS data flows in. The State history panel records every transition with its timestamp.
If the session stalls or flaps, check:
- The router — confirm BGP-LS is up on its side and the neighbor block points at Prelude TE's address.
- Authentication — the auth type and password must match exactly between the two ends.
- AS numbers — the peer AS is the router's AS; the local AS is the one set in Settings → BGP.
- Network reachability — TCP
179between the router and the Prelude TE host must be open both ways. - State history — the panel on the peer detail page records every transition with the reason for failures.
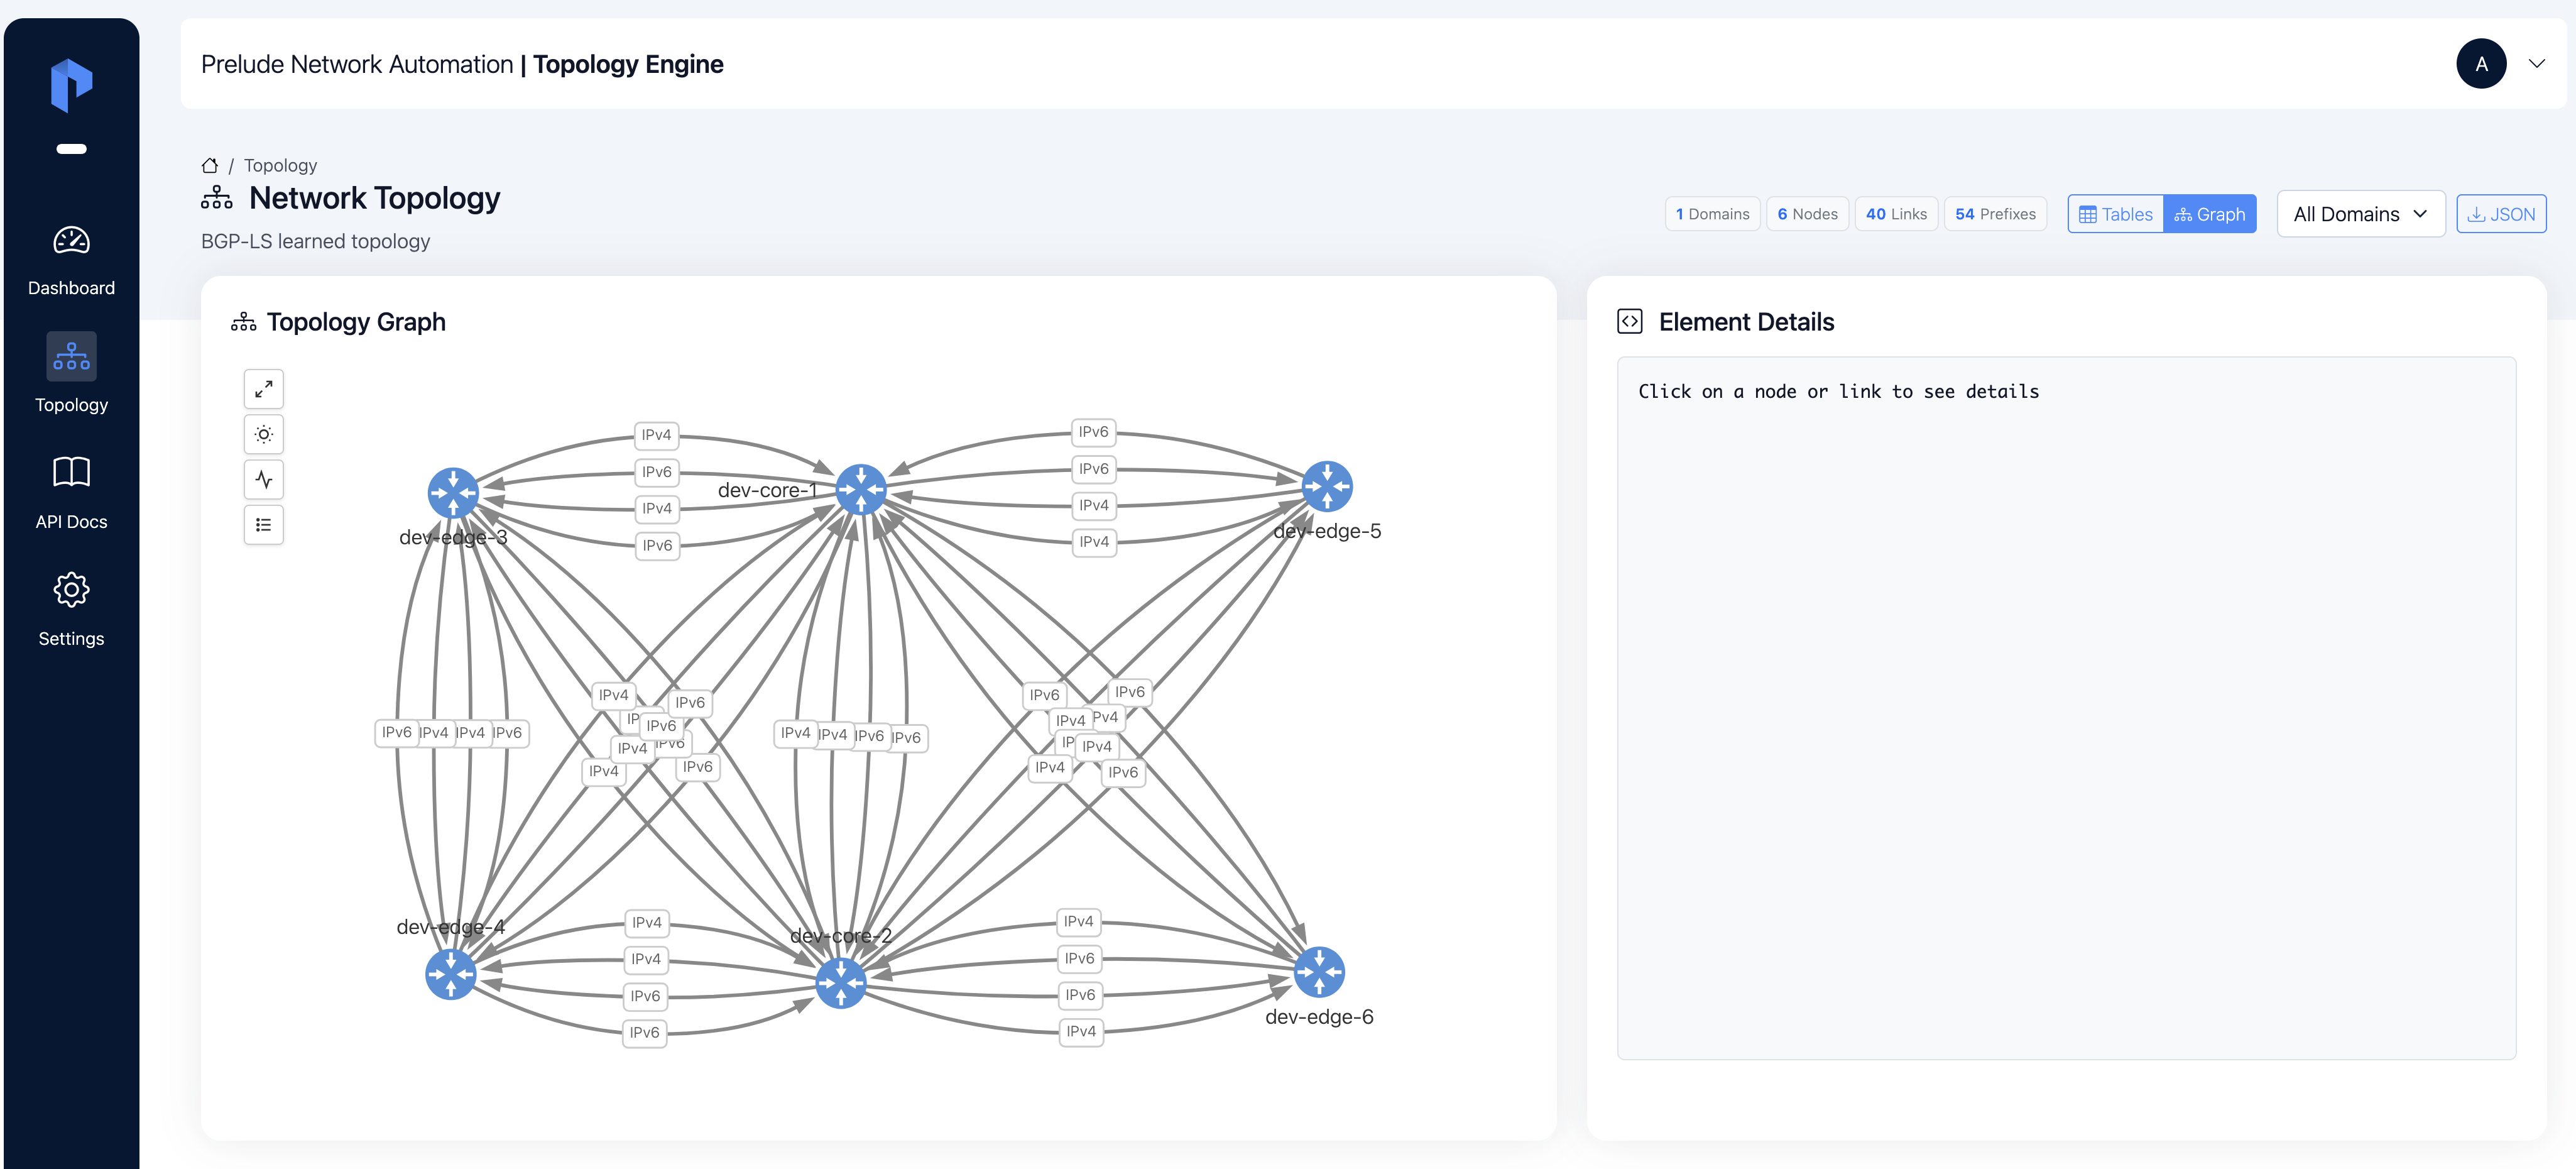
5. See the topology
Once the session is established, the engine starts consolidating the LSDB. Within seconds, the Dashboard counters move and the Topology page populates.
Open Topology in the left navigation. You will see the nodes, links, and prefixes the peer reported, scoped to the IGP domain it belongs to. Use the domain selector at the top of the page to pick a specific domain or to view every domain merged into a single network.
If your peer advertises Segment Routing or Flex-Algo, the same view surfaces the SR-MPLS / SRv6 / Flex-Algo attributes without extra configuration — see Topology / Nodes, Topology / Links, and Topology / Flex-Algo for what each attribute means.
Next
Your first session is up. From here:
- See BGP Peers / Peer redundancy before adding the next peer.
- Plug a NATS consumer into Outputs / NATS to receive every topology change downstream.
- Or browse Next steps for a wider tour of what is available.