
Browse the SNMP MIB tree
Use the collector's MIB Tree Browser to explore loaded MIBs, read an object's SMI type and access, upload a vendor MIB, and run a live SNMP walk that resolves numeric OIDs back to names — all in the web UI.
SNMP is still how a lot of the network reports for duty, and SNMP runs
on OIDs. An OID like 1.3.6.1.2.1.2.2.1.8 means nothing on its own.
You need the MIB that defines it to know it is ifOperStatus, that it
reads up / down, and that the trailing number is an interface
index.
The traditional fix is a pile of .mib files and snmptranslate.
That works, but it lives on someone's laptop, far from the collector
that actually does the walking.
Prelude Collector loads the standard IETF MIB set into the binary and lets you upload vendor MIBs on top. Its MIB Tree Browser turns that into a navigable OID tree, and its SNMP OID Browser runs a live walk against a device and resolves every returned OID back to a name. This tutorial walks both in the web UI. Plan on 15-20 minutes.
What you'll learn
- Open the MIB Tree Browser and navigate an OID tree by name.
- Tell tables, rows, columns, and scalars apart, and read an object's SMI syntax, access, and status.
- Upload a vendor MIB so its OIDs resolve everywhere in the collector.
- Run a live SNMP walk against a device and see numeric OIDs resolved
back to
ifDescr,ifOperStatus, and the rest.
Prerequisites
- Prelude Collector v1.1.0 running, and you signed in to the web UI. See Installation.
- The IETF base MIB set (IF-MIB, IP-MIB, and friends) is bundled with the build, so the browsing steps need no device.
- For the live walk (Step 4) you need one device with SNMP configured in the collector. This walkthrough uses a Cisco IOS-XR node over SNMP v2c.
Step 1 — See what's loaded, and add a vendor MIB
Open Settings → MIB Manager. The page has two halves.
Builtin MIB Modules lists the IETF standard set embedded in the collector — IF-MIB, IP-MIB, ISIS-MIB, the HOST-RESOURCES MIBs, and so on. These are always available; you never upload them.
Upload Vendor MIB is where you extend the resolver. Vendor OIDs
(Cisco, Juniper, Arista) are not in the IETF set, so until you upload
the matching MIB, a walk that hits them comes back as raw numbers.
Choose a .mib, .my, or .txt file and click Upload — it loads
into the resolver immediately, no restart. Uploaded MIBs appear in the
list below with a loaded status.
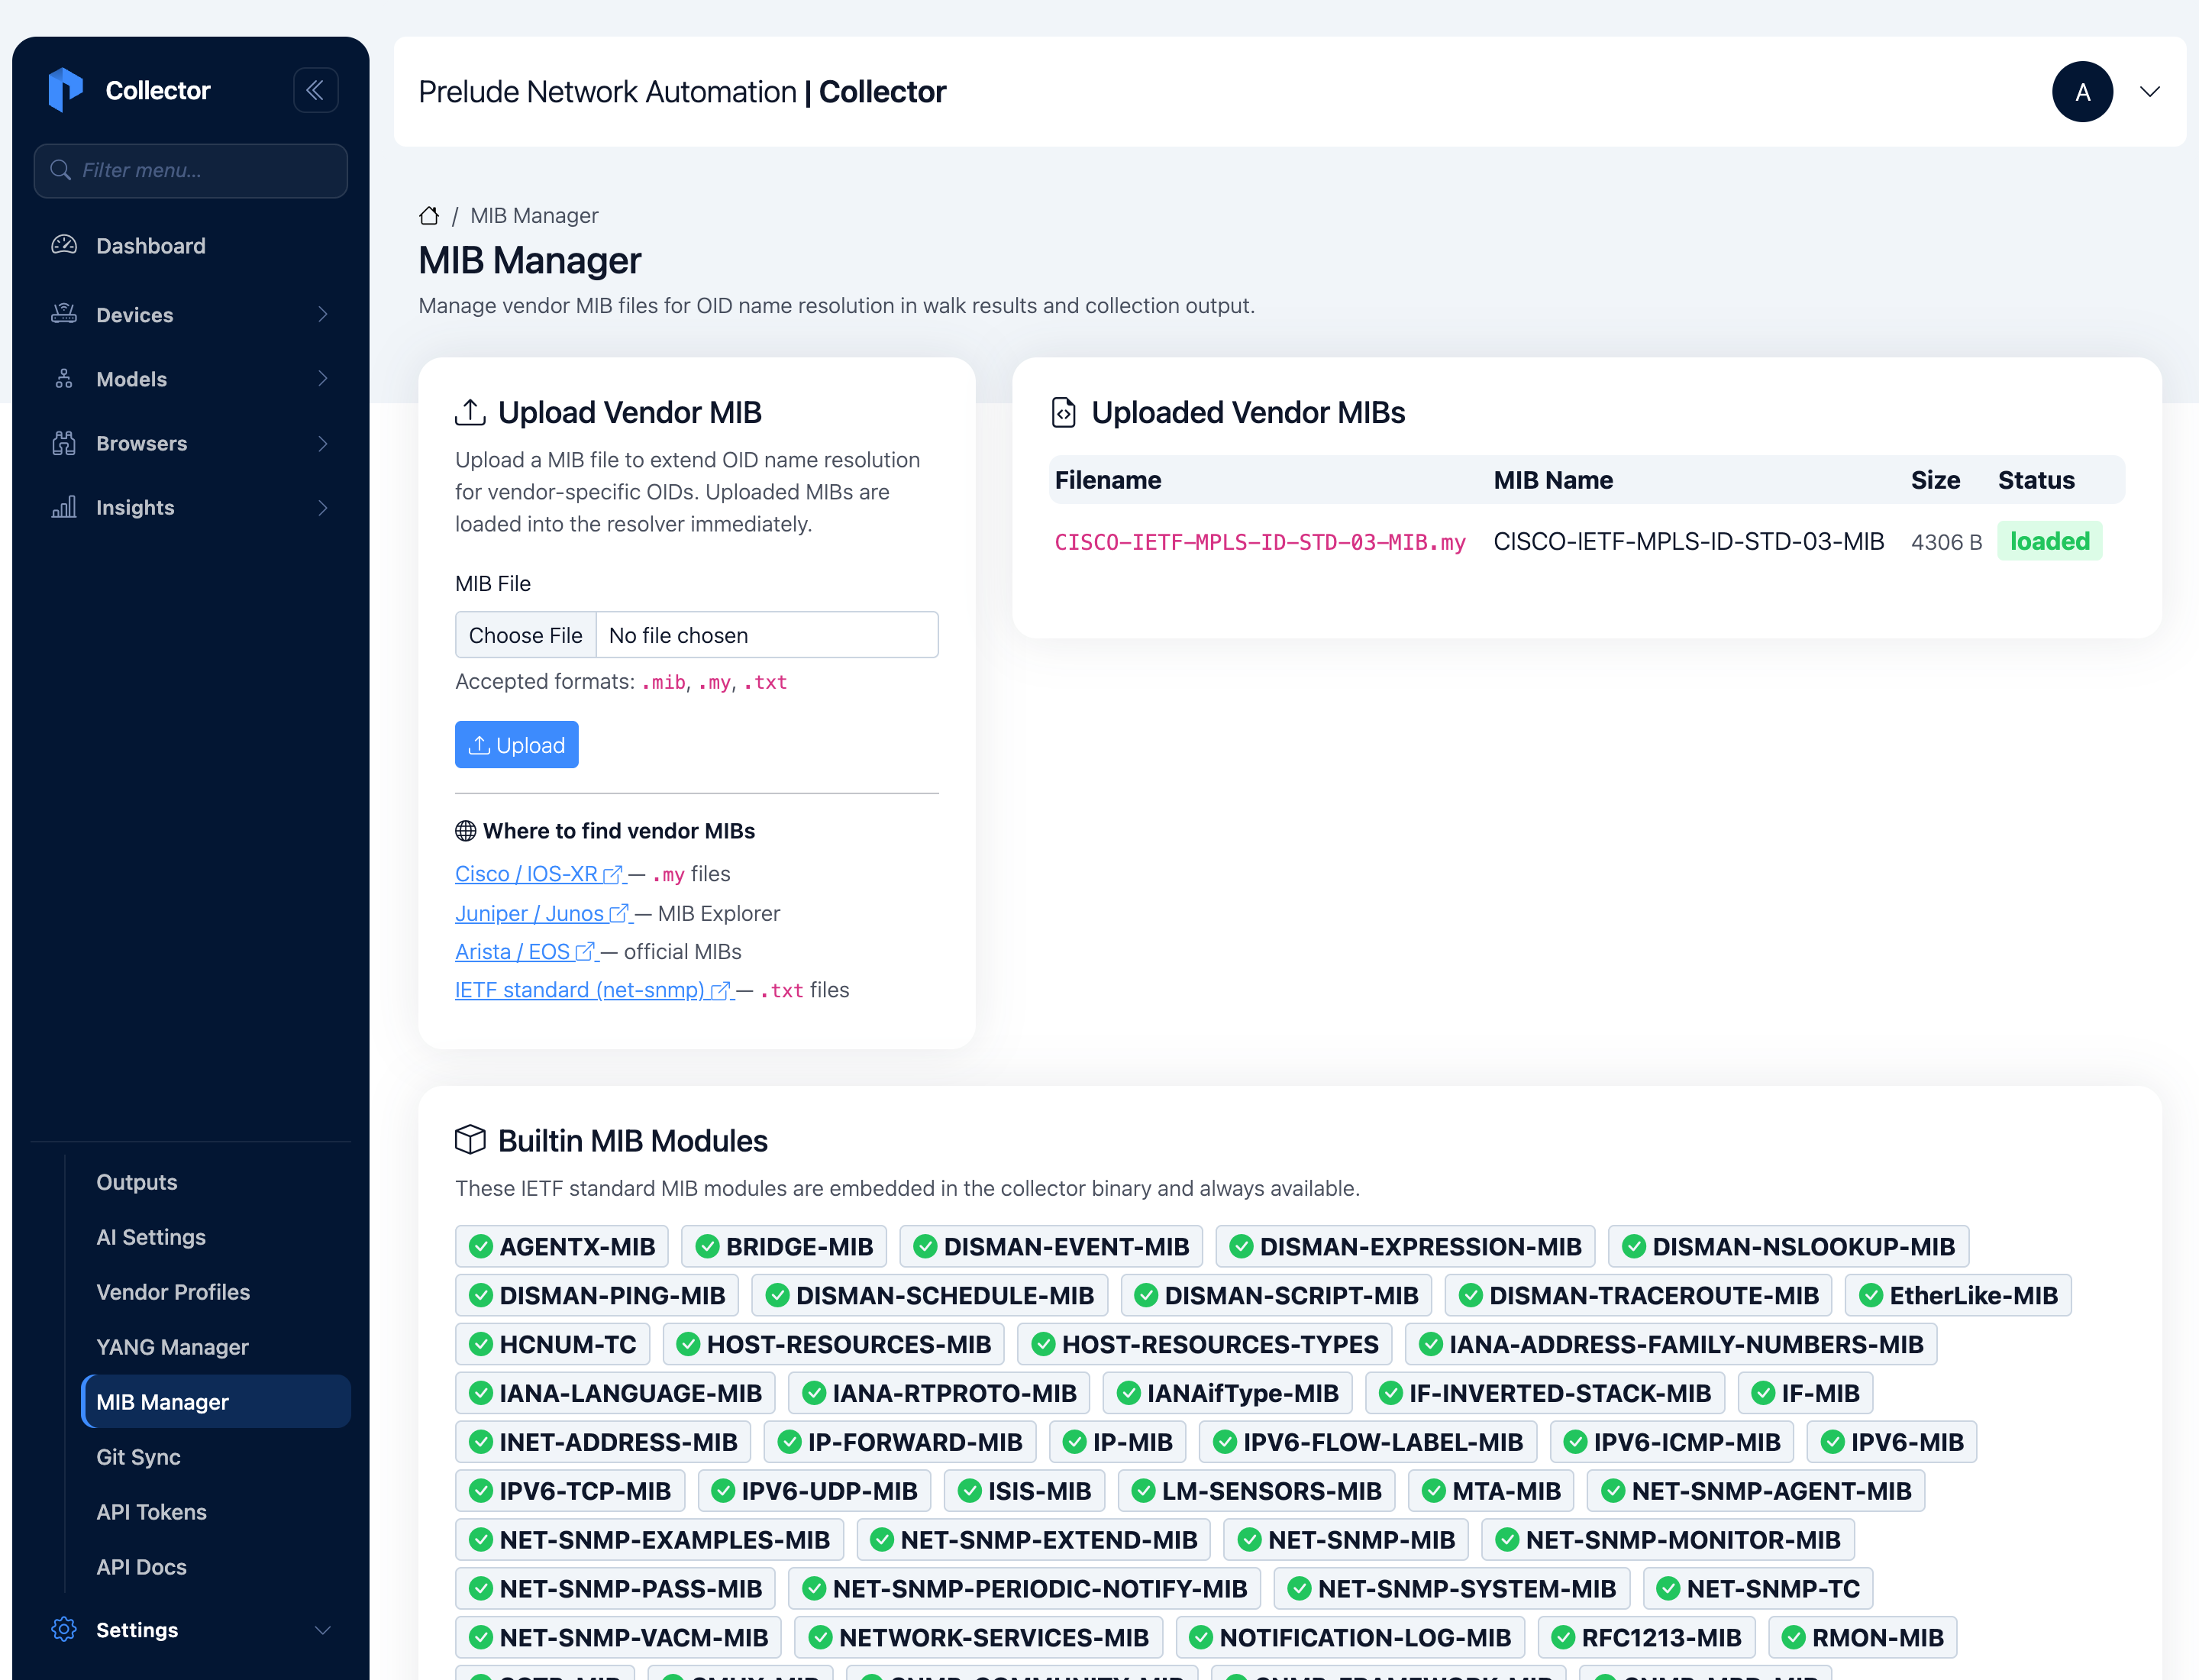
The page also links to where each vendor publishes its MIBs, which saves a search when you need one.
Step 2 — Navigate the MIB tree
Open Browsers → MIB Tree. Pick a module from the Module
dropdown — start with IF-MIB, the interfaces MIB — and the OID tree
loads.
The legend tags each node by its SMI role, and the roles matter:
- SCALAR — a single value, like
ifNumber. You GET it directly. - TABLE — a conceptual table, like
ifTable. It holds rows. - ROW — the row definition, like
ifEntry. It holds columns and declares the index. - COLUMN — one column of the table, like
ifDescrorifOperStatus. There is one value per row. - BRANCH — a structural node with children but no value of its own.
Expand ifTable → ifEntry and the columns appear in OID order:
ifIndex, ifDescr, ifType, ifMtu, ifSpeed, ifAdminStatus,
ifOperStatus, ifInOctets, and the rest. Each shows its SMI type
inline — ifInOctets is a Counter32, ifDescr is a DisplayString.
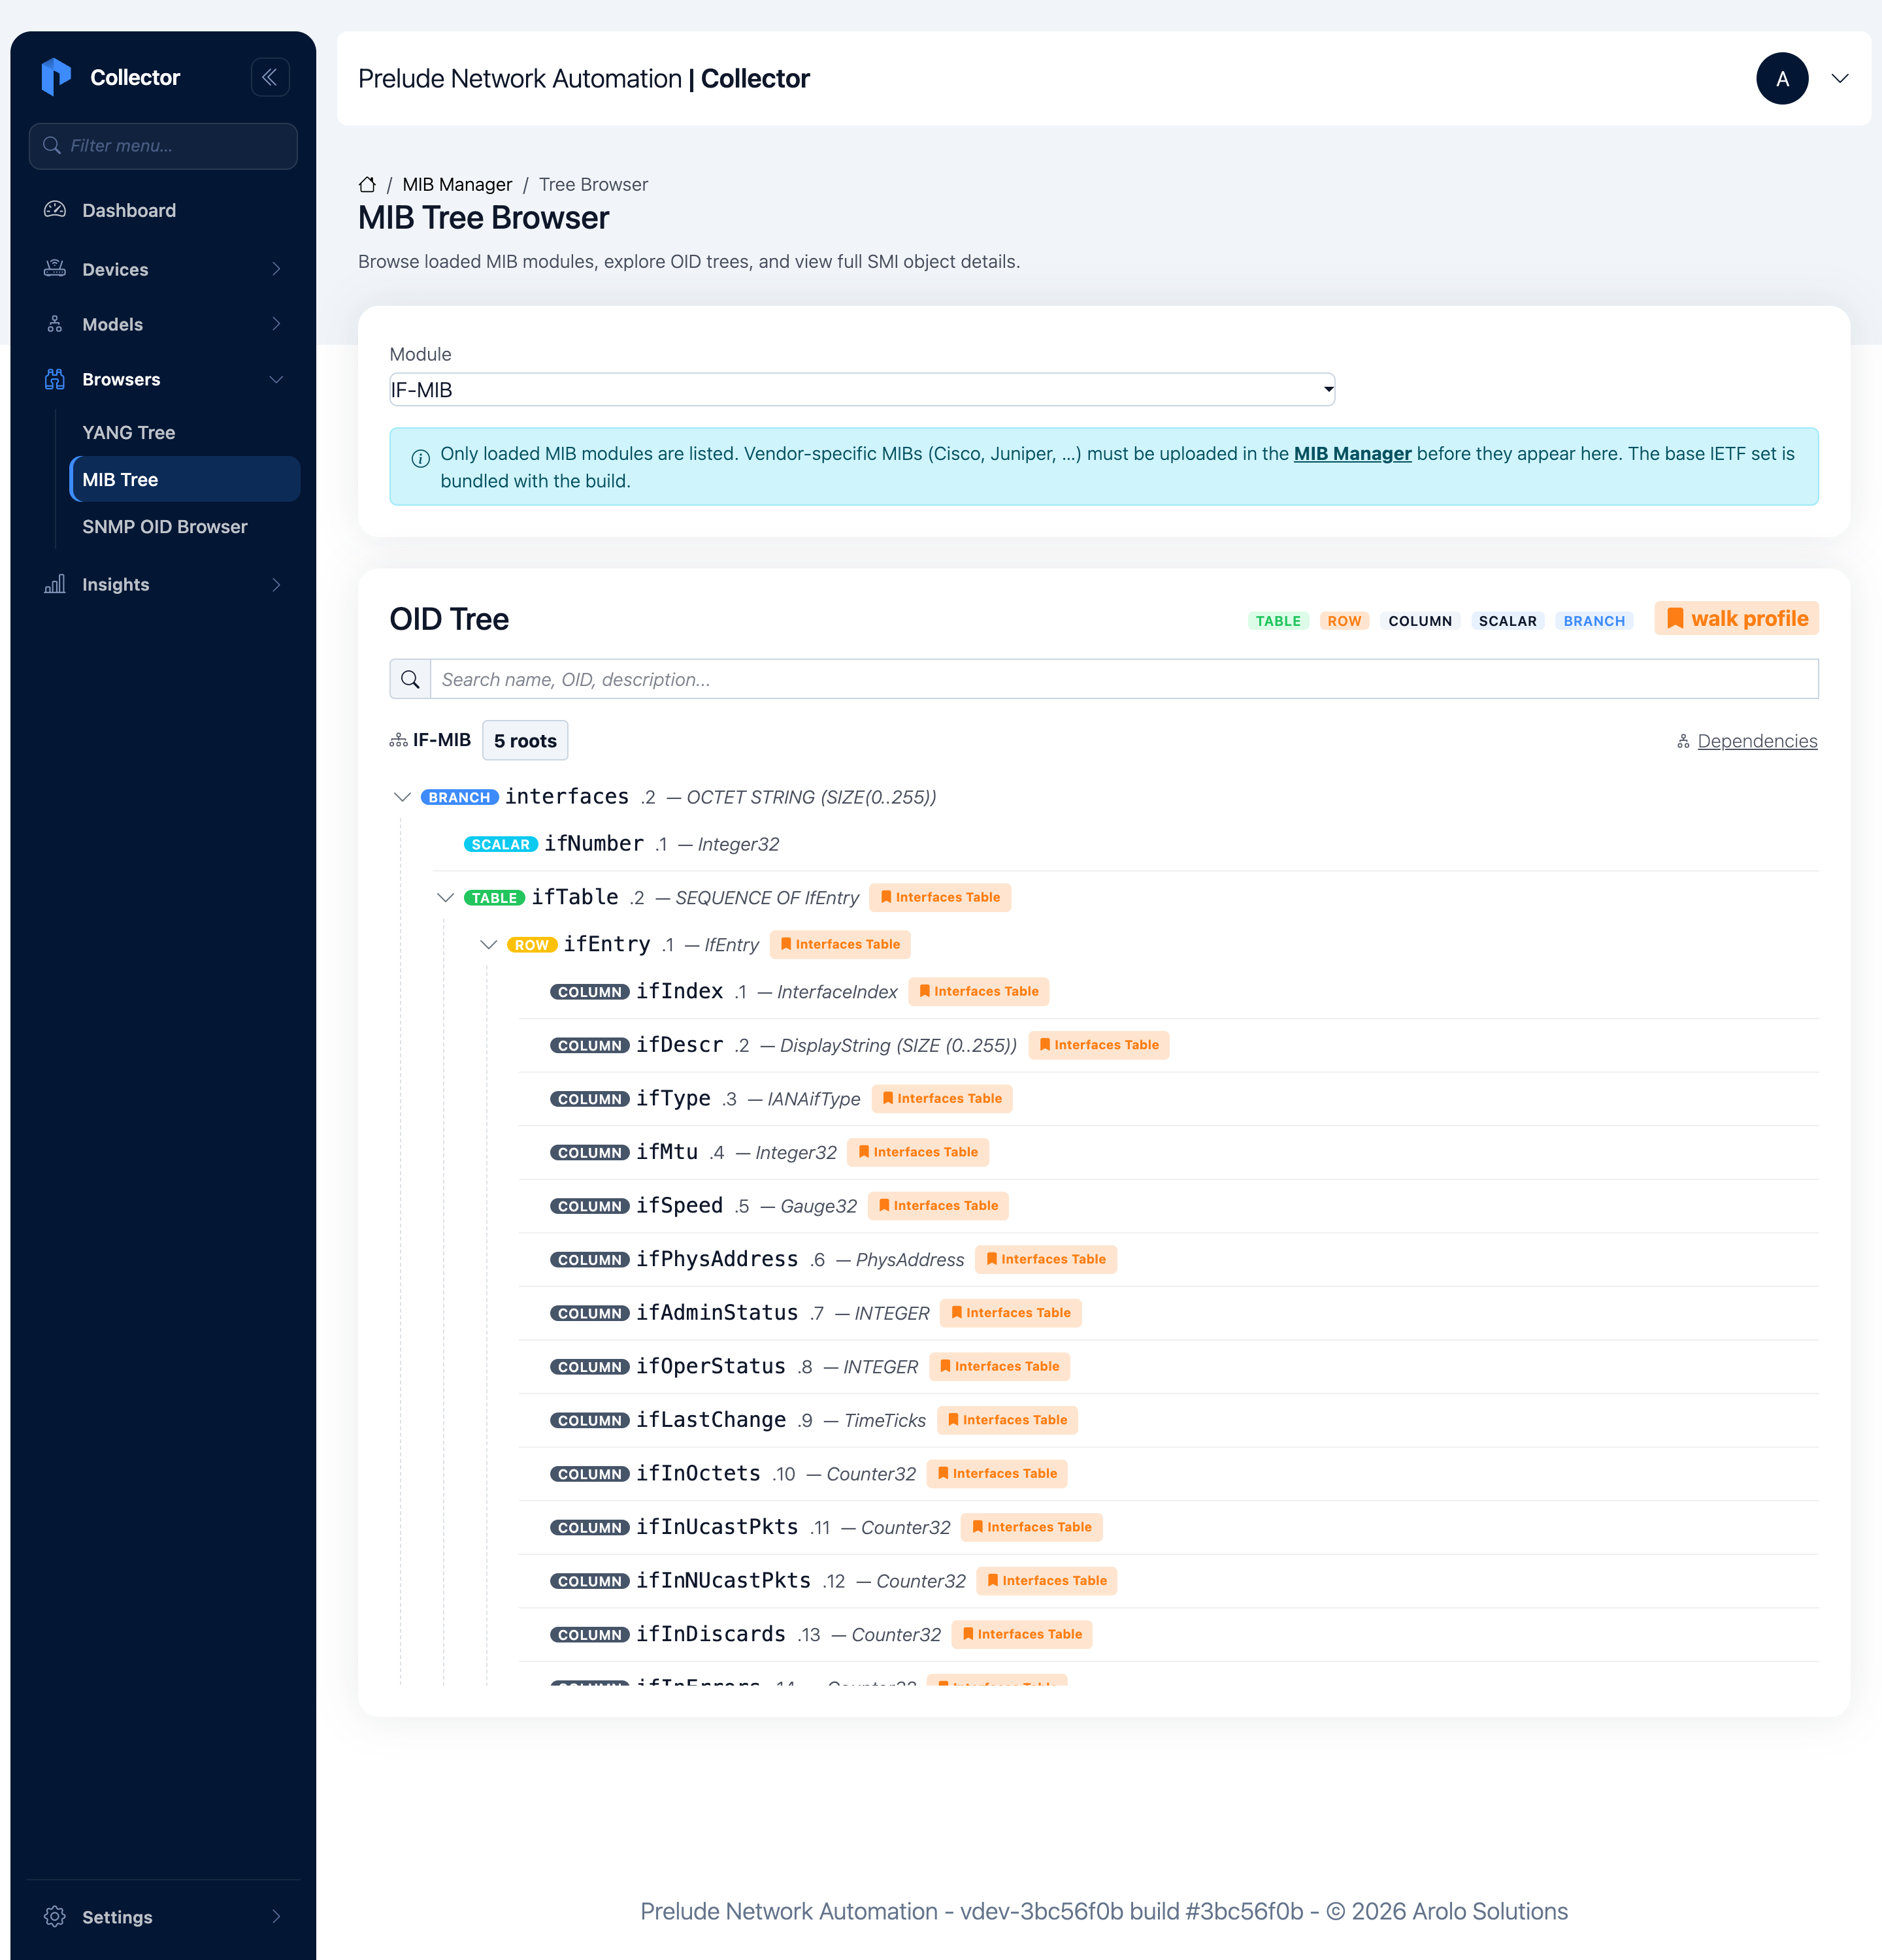
The orange walk profile badges mark OIDs that belong to a saved walk profile — a named subset of the tree the collector knows is safe and useful to walk on a given platform.
Step 3 — Read an object's full SMI detail
Click any object name to open its detail. Click ifOperStatus and you
get the full SMI record:
- OID —
1.3.6.1.2.1.2.2.1.8, with a copy button. - SYNTAX —
INTEGER(an enumeration ofup,down,testing, …). - MAX-ACCESS —
read-only. You can read it, not set it. - STATUS —
current(notdeprecatedorobsolete).
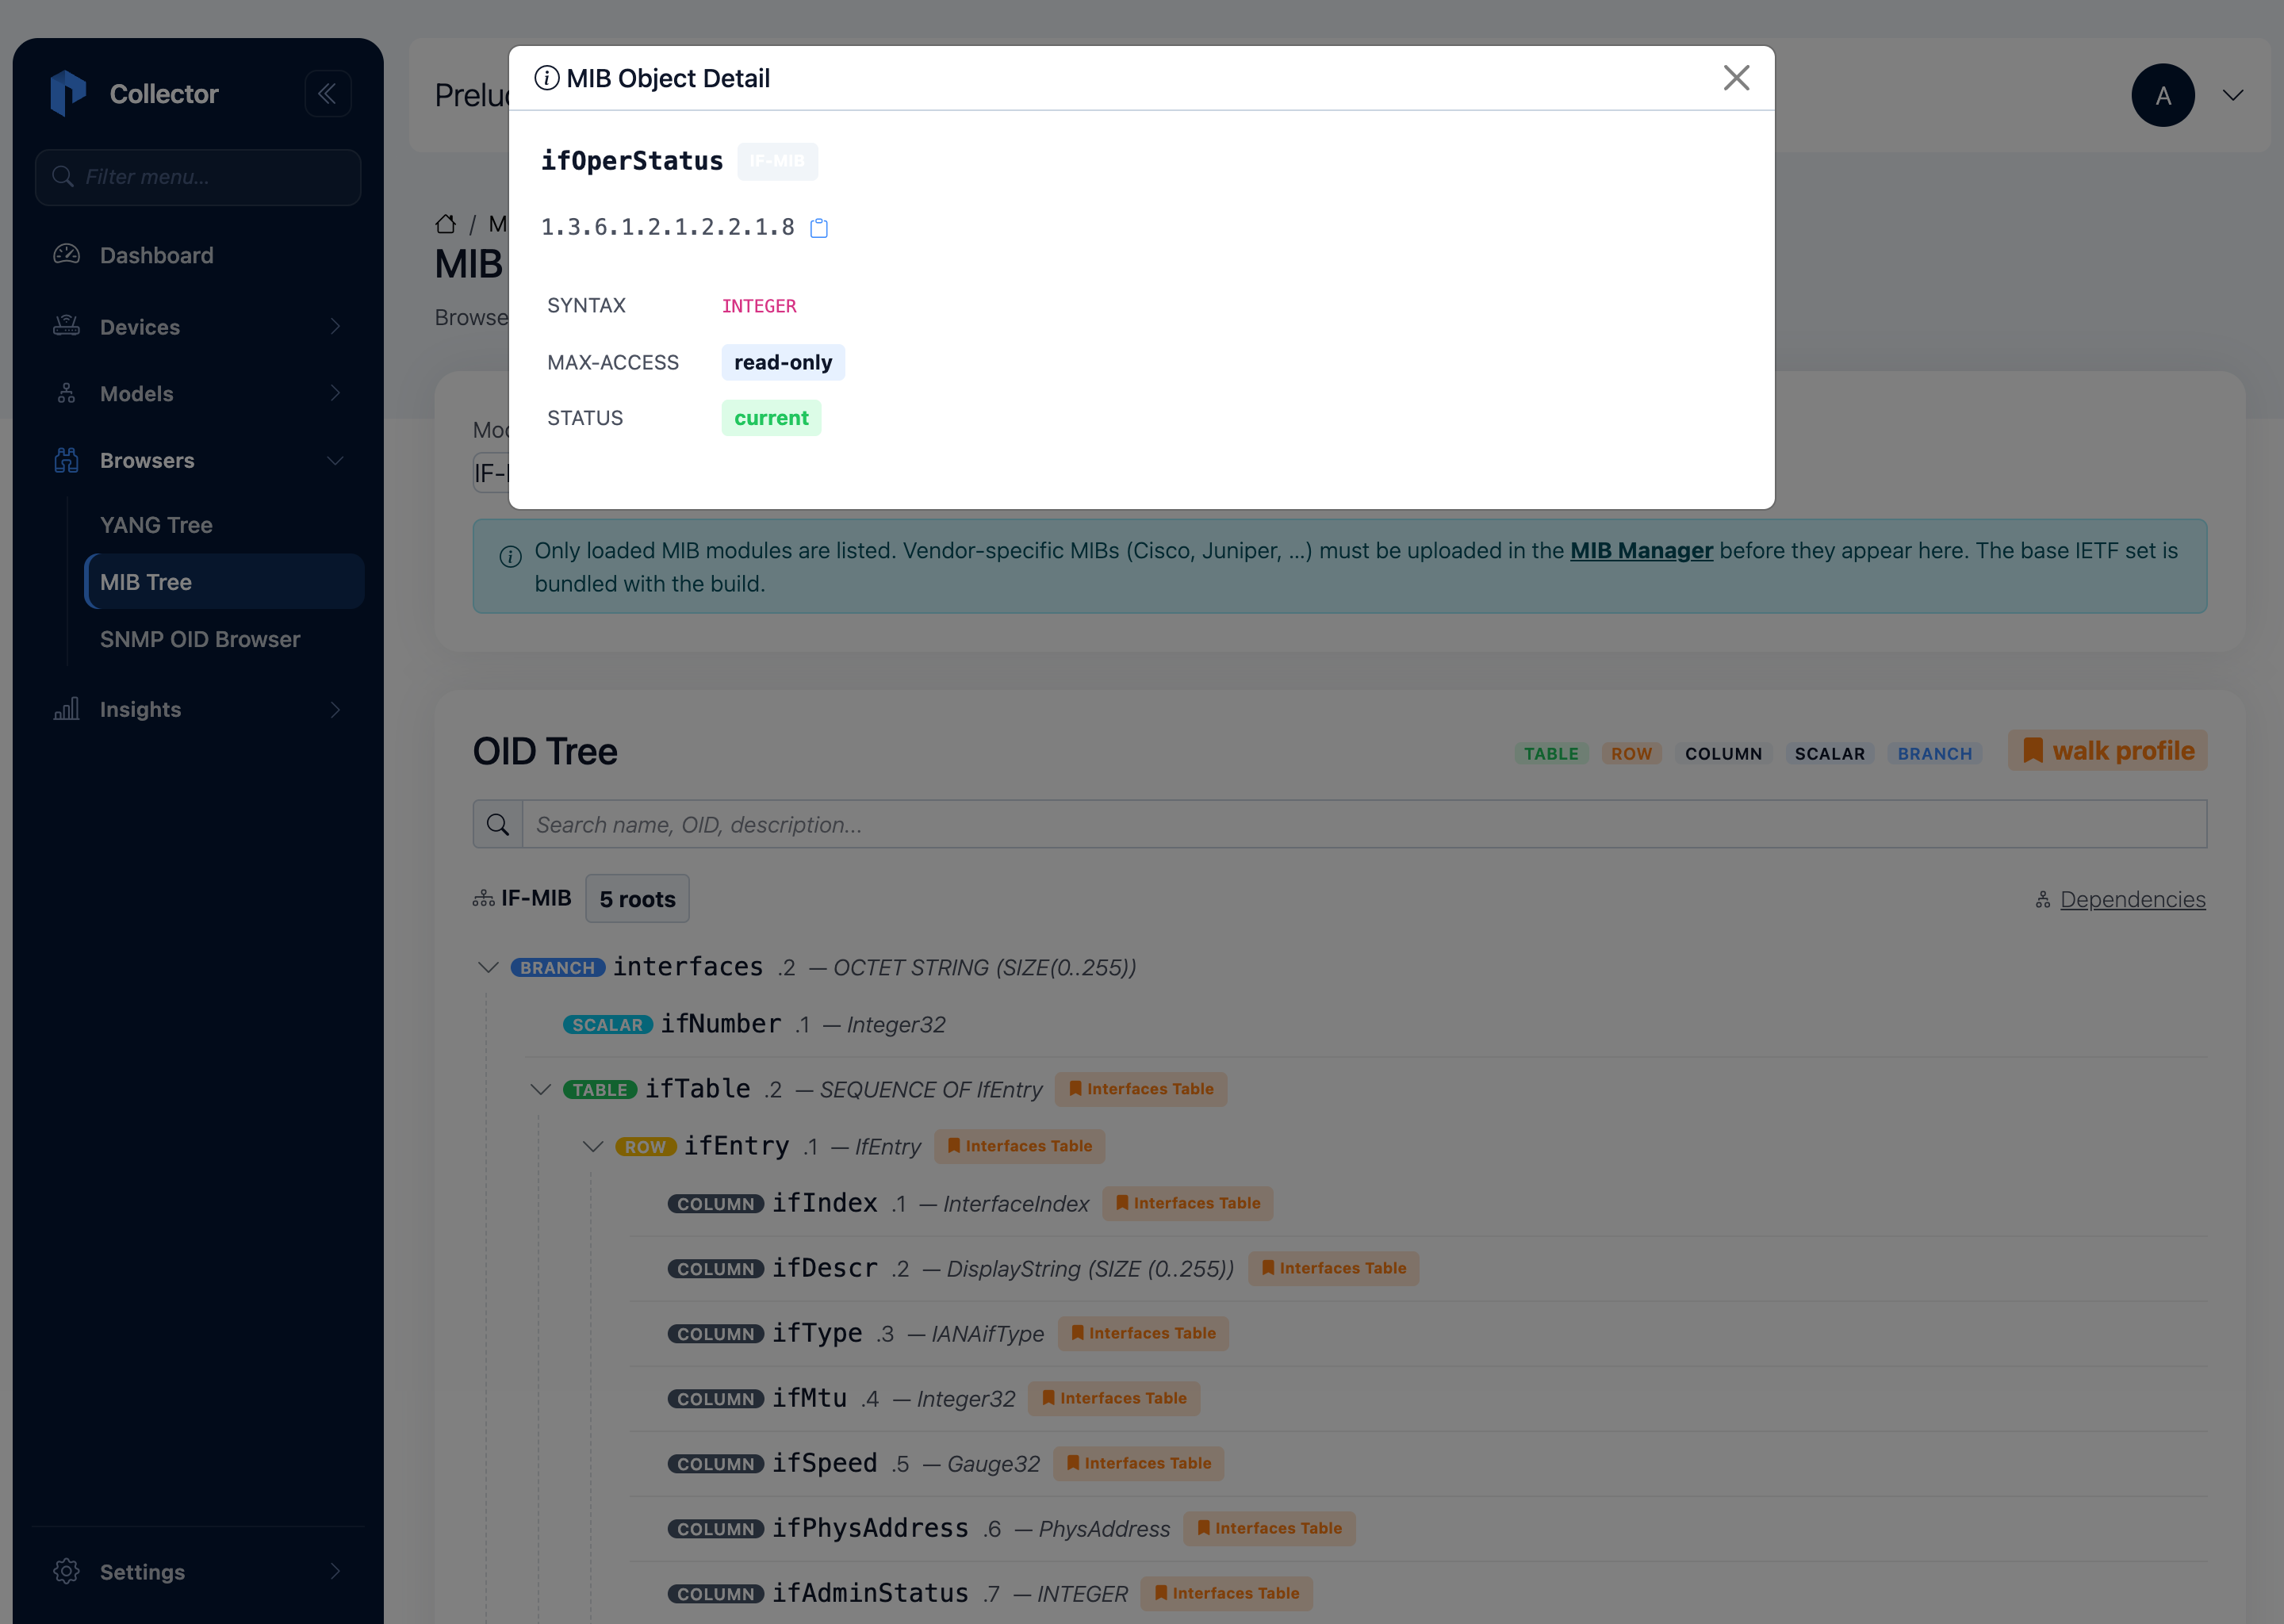
This is the same metadata you'd otherwise dig out of the MIB source by hand. Reading it here tells you, before you ever build a mapping, exactly what an OID returns and whether it's writable.
Step 4 — Run a live walk
Browsing the definition is half the job. The other half is seeing what a real device returns. Open Browsers → SNMP OID Browser.
- Pick a device from Device (SNMP enabled) — the dropdown only lists devices that already have SNMP configured.
- Leave the OID on
.1.3.6.1.2.1.2.2(that'sifTable), keep the Mode onWalk, and choose the Table format. - Click Walk.
The collector walks the device and prints every returned OID with the
name and module resolved from the loaded MIBs. Type ifDescr in the
Filter results box to see it clearly:
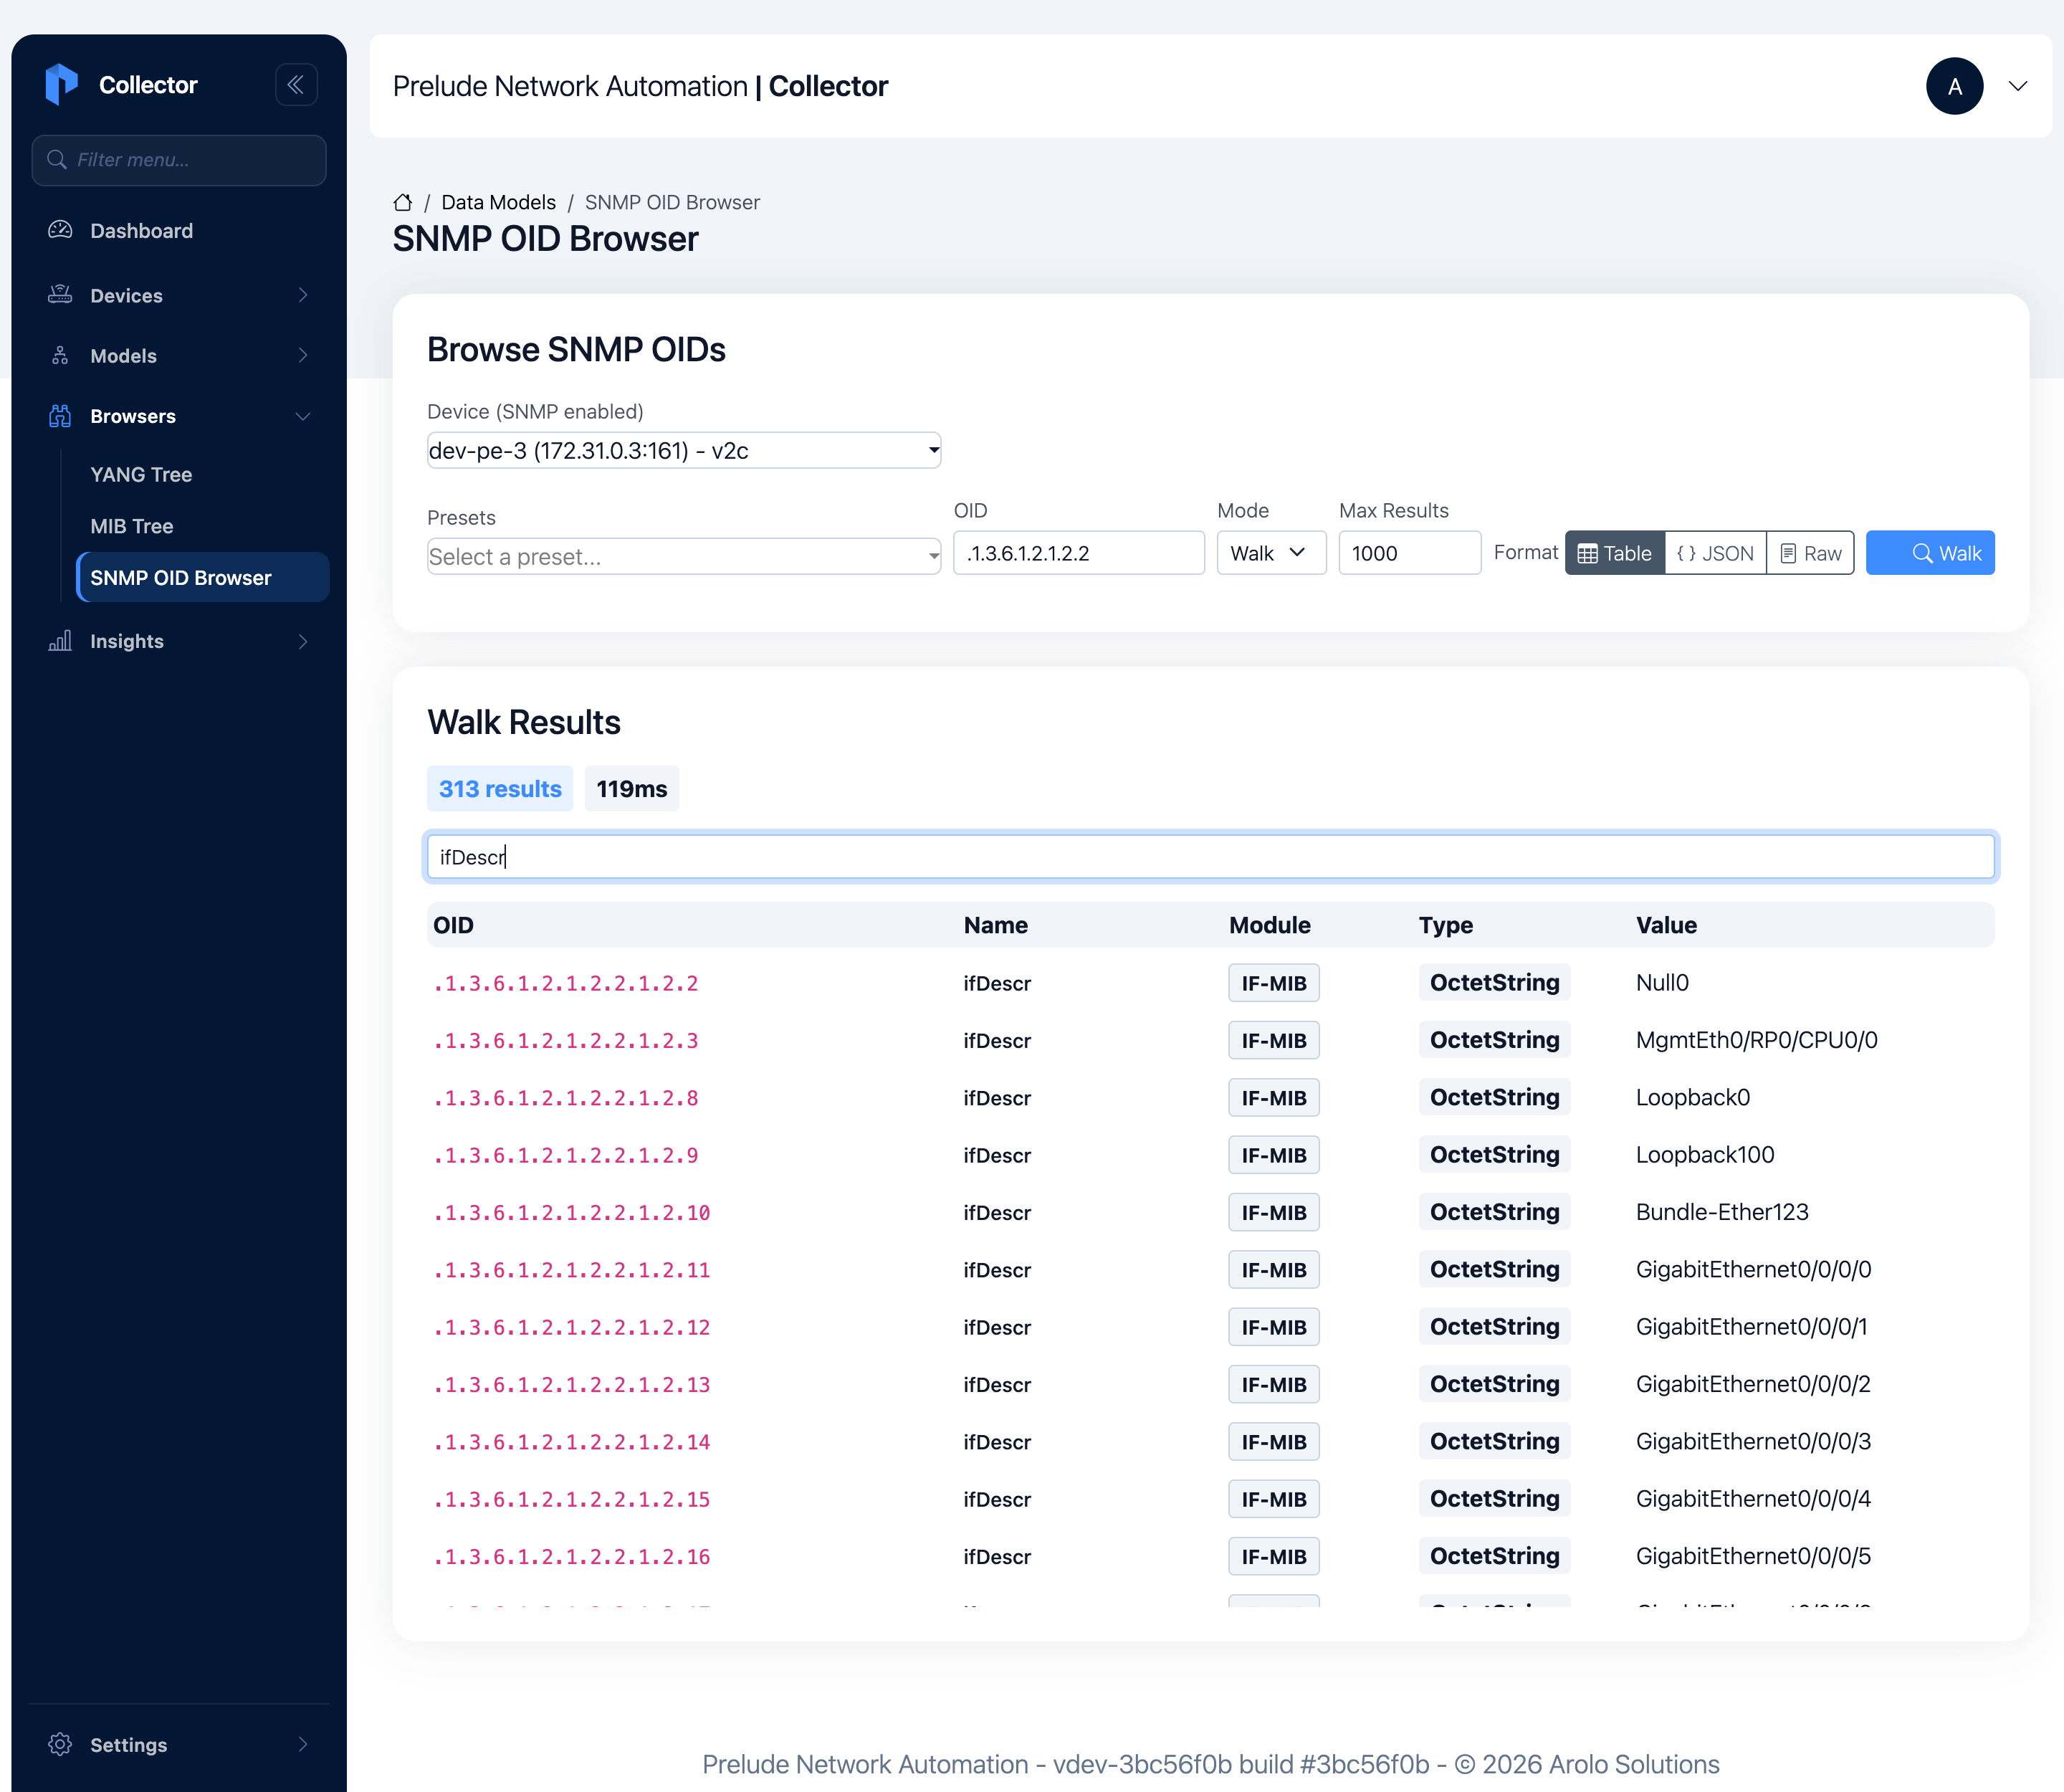
Two things to notice. First, the collector resolved each numeric OID
back to a name (ifDescr, IF-MIB) — that resolution is exactly why you
uploaded vendor MIBs in Step 1. Second, the trailing number on each OID
(...2.2.1.2.11) is the table index: the collector strips it to
match the column definition, and the value column shows the real
interface name the device reported, like GigabitEthernet0/0/0/0.
Verify it works
You're done when:
- [ ] Settings → MIB Manager shows the builtin IETF modules, and any vendor MIB you uploaded reads loaded.
- [ ] Browsers → MIB Tree loads
IF-MIBand expandingifTable → ifEntryshows the columns with their SMI types. - [ ] Clicking
ifOperStatusshows its OID, syntax, access, and status. - [ ] Browsers → SNMP OID Browser returns a walk where numeric OIDs are resolved to names and the values are real device data.
Where to next
- Browse the YANG tree — the same idea for gNMI and NETCONF: find the path before you collect it.
- Interface counters across vendors — bind the OIDs and paths you found into one normalized Model.