Installation
Install Prelude Collector on Linux, Docker, or Podman, including database setup and first-run steps.
Prelude Collector ships as an OCI container image. You can run it with Docker, Podman, or any OCI-compatible runtime, and you can manage it under systemd or your orchestrator of choice.
Prerequisites
Before you install the collector, make sure the following are in place:
| Requirement | Version | Notes |
|---|---|---|
| Container runtime | Docker 24+ or Podman 4+ | Or any OCI runtime. |
| Disk | ~20 GB free | For storage volume and YANG cache. |
| CPU / RAM | 2 vCPU / 2 GB | Sized for ~20 devices; scale up with subscription count. |
PostgreSQL and NATS are bundled in the Quick start with Docker Compose below, so you do not need to install them separately.
The collector image is self-contained: it embeds default OpenConfig YANG models, vendor MIBs for common platforms, and all static assets. Nothing extra needs to be downloaded after pull.
The collector image is published to
registry.arolo-solutions.com/prelude/prelude-collector and is
publicly pullable — no authentication required. The examples below
use the :v1.1.0 tag, the current stable release.
Quick start with Docker Compose
The fastest path to a working install is a single compose file that
runs the collector together with PostgreSQL and NATS on the same
host. Save this as docker-compose.yml:
services:
  collector:
    image: registry.arolo-solutions.com/prelude/prelude-collector:latest
    container_name: prelude-collector
    restart: unless-stopped
    ports:
      - "4030:4030"
    environment:
      COLLECTOR_DB_HOST: postgres
      COLLECTOR_DB_PORT: "5432"
      COLLECTOR_DB_USER: prelude
      COLLECTOR_DB_NAME: collector
      COLLECTOR_DB_PASSWORD: ${POSTGRES_PASSWORD:-change-me-sE43kapqD8df5fds}
      COLLECTOR_APP_URL: http://localhost:4030
    volumes:
      - collector-data:/app/storage
    depends_on:
      postgres:
        condition: service_healthy
      nats:
        condition: service_started
    networks:
      - prelude
  postgres:
    image: postgres:18-alpine
    container_name: prelude-postgres
    restart: unless-stopped
    environment:
      POSTGRES_USER: prelude
      POSTGRES_PASSWORD: ${POSTGRES_PASSWORD:-change-me-sE43kapqD8df5fds}
      POSTGRES_DB: collector
    volumes:
      - postgres-data:/var/lib/postgresql
    healthcheck:
      test: ["CMD-SHELL", "pg_isready -U prelude -d collector"]
      interval: 2s
      timeout: 3s
      retries: 15
    networks:
      - prelude
  nats:
    image: nats:2
    container_name: prelude-nats
    restart: unless-stopped
    networks:
      - prelude
volumes:
  collector-data:
  postgres-data:
networks:
  prelude:
    driver: bridge
There is nothing to prepare before the first launch. Prelude Collector
is configured entirely through COLLECTOR_* environment variables. It
serves over HTTPS by
default: on first start, if you have not supplied a certificate, gweb
(its web server) generates a self-signed certificate under
storage/certs/ and serves with it, so an evaluation install needs no
TLS preparation either.
The compose file above already wires the collector to the bundled
PostgreSQL — COLLECTOR_DB_HOST is the postgres service, the database
is collector, and the user is prelude. The one value to confirm is
the database password:
COLLECTOR_DB_PASSWORDmust match thePOSTGRES_PASSWORDof thepostgresservice. Both default tochange-me-sE43kapqD8df5fds; setPOSTGRES_PASSWORDin an.envfile next todocker-compose.ymlto override both at once.
NATS is not configured through environment variables. You set it up
later in the web UI under Output Settings → NATS — that single
connection powers both data export and the collector's internal
signaling. After first boot, open Output Settings → NATS, set the URL
to nats://nats:4222 (the bundled nats service), and enable it.
For the full set of COLLECTOR_* variables and their defaults, see
Configuration.
Start the stack:
docker compose up -d
Port 4030 now serves the REST API and web UI over HTTPS, using
the auto-generated self-signed certificate. Your browser — and curl
— will warn on it the first time; accept the certificate (or pass
curl -k). To serve a certificate of your own instead, see
TLS below.
To scrape device data into Prometheus, attach the
Prometheus output backend; it runs its own
HTTP server on a configurable port (default 9090, path
/metrics/collector) and you map that port separately.
Running on Podman
For production on Podman, deploy the stack as Quadlet + systemd
units rather than running Compose under a shell — declarative
.container units that systemd manages directly, with proper start
ordering, restart policy, journal logging, and start-at-boot. AlmaLinux,
RHEL, and Rocky are SELinux-enforcing, so host bind mounts take a :Z
suffix and the units below carry it.
The full Podman reference — the four Quadlet units (network, PostgreSQL,
NATS, collector), a podman kube play manifest, SELinux and rootless
notes, and updates — lives on its own page:
For a quick evaluation you can still run the Compose file from
Quick start with Docker Compose
under podman compose (it delegates to a Compose provider such as the
docker-compose v2 binary), but Quadlet is the recommended shape for
anything past evaluation.
Running standalone (without Compose)
If your PostgreSQL and NATS already exist elsewhere, run only the collector container:
docker run -d \
  --name prelude-collector \
  -p 4030:4030 \
  -e COLLECTOR_DB_HOST=your-postgres-host \
  -e COLLECTOR_DB_PORT=5432 \
  -e COLLECTOR_DB_USER=prelude \
  -e COLLECTOR_DB_PASSWORD=change-me-sE43kapqD8df5fds \
  -e COLLECTOR_DB_NAME=collector \
  -v $(pwd)/storage:/app/storage \
  registry.arolo-solutions.com/prelude/prelude-collector:latest
Point COLLECTOR_DB_HOST at your existing PostgreSQL - see
Configuration for the full set of COLLECTOR_DB_*
variables. NATS is not set through environment variables; point it at
your existing NATS after first boot in the web UI under
Output Settings → NATS.
Database setup
The collector migrates its schema automatically on startup when
COLLECTOR_AUTO_MIGRATE is true (the default). If you used the
compose file above, PostgreSQL is bootstrapped automatically from the
environment variables and there is nothing to do — the schema is
created on first boot.
If you are pointing the collector at an existing PostgreSQL, create the database and user beforehand:
psql -h <your-host> -U postgres \
  -c "CREATE USER prelude WITH PASSWORD 'change-me-sE43kapqD8df5fds';" \
  -c "CREATE DATABASE collector OWNER prelude;"
If you set COLLECTOR_AUTO_MIGRATE to false, startup blocks until
the schema is current; apply pending migrations explicitly inside the
container:
docker compose exec collector ./prelude-collector migrate up
Migrations are idempotent - it is safe to run them on every deployment.
First-run setup
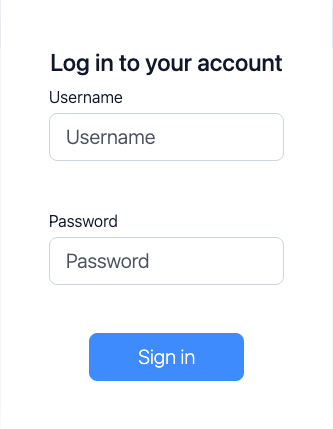
Sign in for the first time
On first boot, the collector seeds a default administrator with these credentials:
| Field | Value |
|---|---|
| Username | admin |
| Password | @rolo!Pass246 |
Open the web UI on port 4030, sign in with the credentials above,
and you will be prompted to change the password before reaching
the dashboard. The default password is only ever accepted once.
Generate an API token
The First Collection walkthrough drives the REST
API, which authenticates with a Bearer token. Once you have signed in
and changed the password, issue a token for the admin user. The
fastest way is the web UI — Settings → API Tokens → New Token; or
from the command line inside the container:
docker compose exec collector ./prelude-collector user token \
  -u admin -d api-token
The command prints a Bearer token. Copy it now - it is shown only once. Store it somewhere safe and export it for use with the API:
export TOKEN="<your-api-token>"
For a fuller treatment of licensing, the free tier, and expiry, see Licensing.
Verifying the install
Check that the API responds:
curl -sk https://collector.example.com/api/v1/ping \
  -H "Authorization: Bearer $TOKEN"
Bruno: 01 Auth and Health / Ping (no auth)
You should see {"status": "ok"}. -k tells curl to accept the
self-signed certificate; drop it once the collector presents a chain
your client already trusts.
Check that the runtime metrics snapshot is reachable through the API:
curl -sk https://collector.example.com/api/v1/metrics \
  -H "Authorization: Bearer $TOKEN" | head
Bruno: 01 Auth and Health / Metrics
You should see a JSON document with per-subscription counters and channel telemetry. The collector's pipeline metrics are not Prometheus-formatted — see Metrics for the two metric families and how to scrape device data into Prometheus.
If both checks pass, you are ready to move on to Configuration.
The web UI is reachable at the same address. On first visit the collector serves the login form; sign in with the seeded admin (after the password change from First-run setup) and you are dropped into the dashboard.
TLS
Prelude Collector serves the web UI and REST API over HTTPS by
default. On first start, if you have not supplied a certificate,
gweb generates a self-signed certificate under storage/certs/
and serves with it. Your browser will warn the first time you open the
UI; accept the certificate and you are in.
The self-signed certificate is meant for evaluation only. For any other deployment, supply your own certificate.
Using your own certificate
To serve your own certificate, set both COLLECTOR_TLS_CERT and
COLLECTOR_TLS_KEY to the in-container paths of the fullchain
certificate and the private key. If either is unset, gweb falls back to
the auto-generated self-signed certificate. Place the files somewhere
under the mounted storage/ directory so they persist, and point the
variables at them:
services:
  collector:
    environment:
      COLLECTOR_TLS_CERT: /app/storage/certs/collector.crt
      COLLECTOR_TLS_KEY: /app/storage/certs/collector.key
The paths are read inside the container. The compose file above
mounts the collector-data volume at /app/storage, so the paths
resolve. Restart the collector after changing these variables.
Replace the self-signed certificate before exposing the collector beyond a trusted network
Bearer tokens travel in the Authorization header on every API
request — a chain your clients actually trust is what makes that
safe.
Optional: install the Prelude MCP server
If you plan to drive the collector from an AI tool (Claude Code, Cursor, Codex…), install the Prelude MCP server alongside the collector. It is a separate, stateless service that exposes the collector's REST API over the Model Context Protocol.
The MCP server image is published to
registry.arolo-solutions.com/prelude/prelude-mcp — the same
public registry as the collector, so you can pull it straight away:
docker run -d --name prelude-mcp \
  -p 4040:4040 \
  -e PRELUDE_COLLECTOR_URL=https://collector.example.com \
  -e PRELUDE_COLLECTOR_ENABLED=true \
  registry.arolo-solutions.com/prelude/prelude-mcp:latest serve
The MCP server listens on port 4040 and forwards your AI tool's
requests to the collector using a per-request X-Collector-Token
header (so no tokens are stored on the server). For full
configuration, transport options, and the companion skill that
teaches your AI how to use the tools, see
Prelude MCP server.
Skip this section if you are not using AI tooling — the collector is fully functional on its own.