First Collection
A 10-15 minute walkthrough that takes Prelude Collector from running to a live snapshot of interface counters.
This walkthrough takes about 10-15 minutes. By the end, Prelude Collector will be polling a real device and you will have read back a snapshot of interface counters.
You can drive the collector three ways — via the REST API, the MCP server, or the web UI — and every step in this guide is reachable from any of them:
- REST API — what this walkthrough uses by default. Every step
is a
curlcommand you can copy into a shell. - MCP server — drive the same endpoints from an AI tool (Claude Code, Cursor, Codex…). See Prelude MCP server for setup.
- Web UI —
https://collector.example.comexposes the same operations as forms. The UI is the fastest path if you would rather click than script.
Pick whichever fits your environment; the underlying objects are
identical. UI links throughout this guide point at
https://collector.example.com; substitute your collector's host if it is
running elsewhere.
What you need
- Prelude Collector running and reachable on
https://collector.example.com(see Installation). - A Bearer token for the admin user (see Installation).
- One reachable network device that speaks gNMI on port 6030. Any Cisco, Juniper, Nokia, or Arista platform with gNMI enabled will do. Have its IP, username, and password ready.
No hardware? Run Nokia SR Linux in Docker. SR Linux ships as a public container image (
ghcr.io/nokia/srlinux) with gNMI enabled by default — the fastest way to follow this walkthrough without real equipment.The recommended driver is Containerlab, which handles SR Linux's privileged-container requirements, a sane bootstrap config, and certificate generation for you. A minimal
topology.clab.ymllooks like:name: srl-lab topology: nodes: srl1: kind: nokia_srlinux image: ghcr.io/nokia/srlinux:latest
sudo containerlab deploybrings the node up. Default credentials areadmin/NokiaSrl1!, gNMI listens on TCP/57400 — point the collector atsrl1:57400(or use Containerlab's exposed port and set$DEVICE_IP:$DEVICE_PORTaccordingly).
Set up environment variables for the rest of the walkthrough:
export BASE="https://collector.example.com"
export TOKEN="<your-api-token>"
Step 1 - Check the collector is alive
curl -s "$BASE/api/v1/ping" \
  -H "Authorization: Bearer $TOKEN"
Bruno: 01 Auth and Health / Ping (no auth)
Or in the UI: Health dashboard — https://collector.example.com/health
(replace the host if your collector runs elsewhere).

Expected:
{"status": "ok"}
If you get 401 Unauthorized, the token is wrong or expired -
issue a fresh one (see Installation). If the request
times out, the collector is not reachable on BASE.
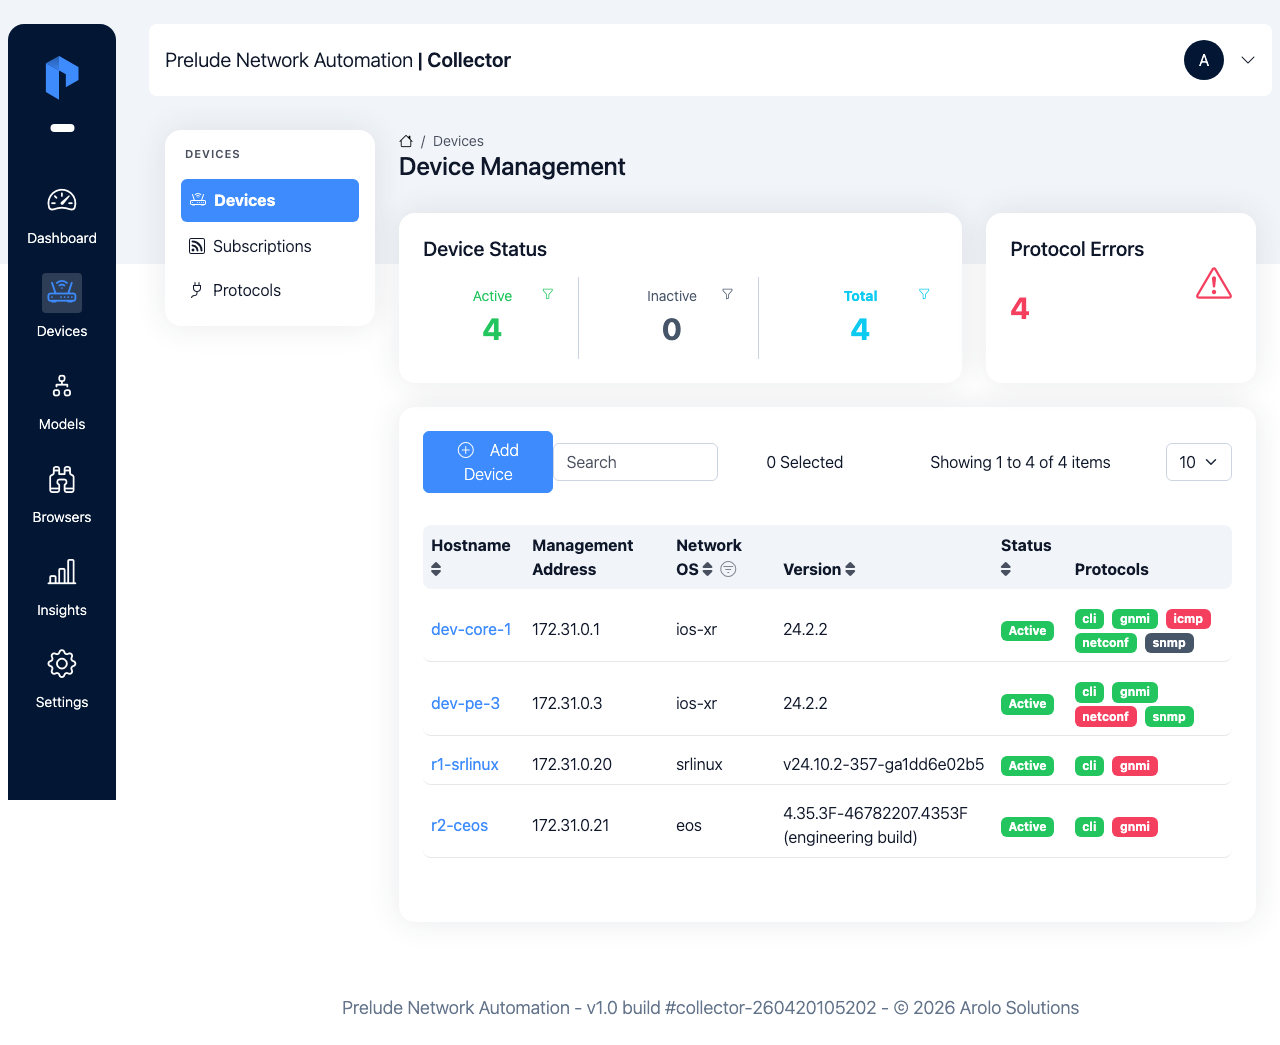
Step 2 - Add a Device
A Device represents one network element you want to collect from. Create one:
curl -s -X POST "$BASE/api/v1/devices" \
  -H "Authorization: Bearer $TOKEN" \
  -H "Content-Type: application/json" \
  -d '{
    "name": "core-router-01",
    "ip": "192.0.2.10",
    "active": true
  }'
Bruno: 02 Devices / Create device
Or in the UI: Devices → New device — https://collector.example.com/devices
Expected (HTTP 201):
{
  "id": 1,
  "name": "core-router-01",
  "ip": "192.0.2.10",
  "active": true
}
Capture the returned id for the next steps:
export DEVICE_ID=1
Step 3 - Attach a Protocol
A Protocol tells the collector how to talk to the Device. Attach gNMI:
curl -s -X POST "$BASE/api/v1/protocols" \
  -H "Authorization: Bearer $TOKEN" \
  -H "Content-Type: application/json" \
  -d '{
    "device_id": 1,
    "type": "gnmi",
    "address": "192.0.2.10:6030",
    "username": "admin",
    "password": "<your-device-password>",
    "insecure": true
  }'
Bruno: 03 Protocols / Create gNMI protocol
Or in the UI: Protocols → New protocol — https://collector.example.com/protocols

insecure: true accepts a self-signed certificate. For production
use, set insecure: false and configure a CA bundle - see the
Protocols section once you finish this walkthrough.
Step 4 - Pick a Model
Models describe what the collector knows how to parse. List the ones registered out of the box:
curl -s "$BASE/api/v1/models" \
  -H "Authorization: Bearer $TOKEN"
Bruno: 04 Models / List models
Or in the UI: Models — https://collector.example.com/models
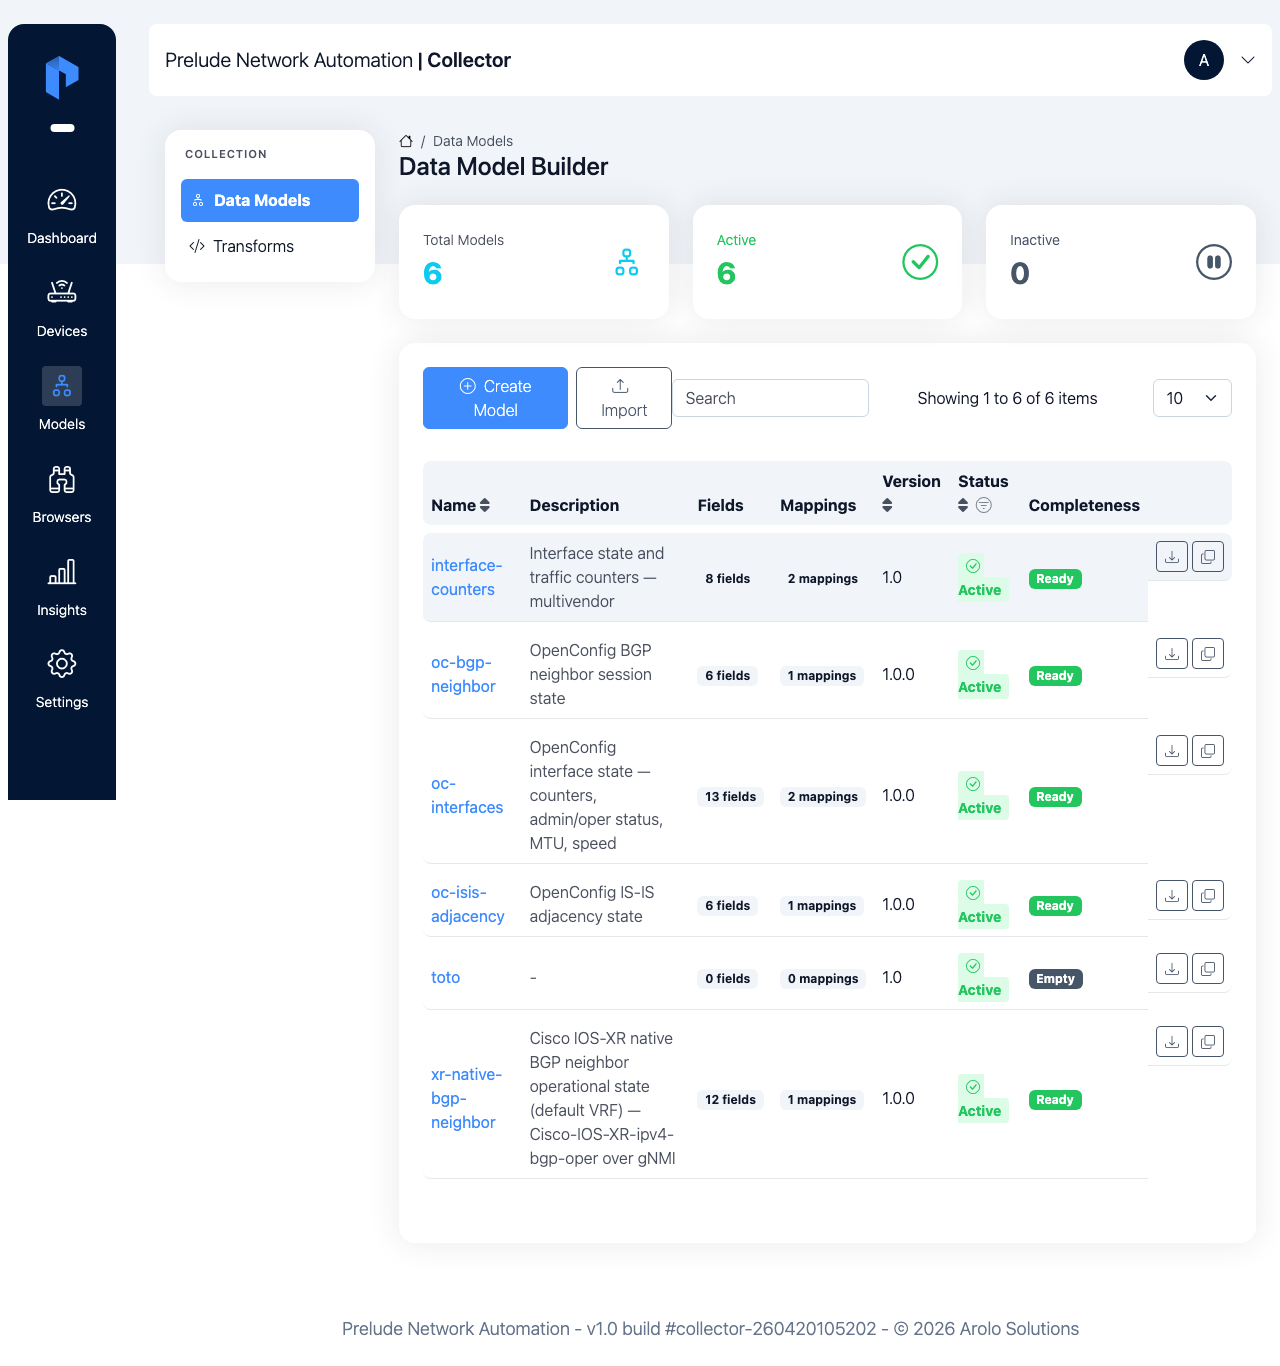
You will see a list including interfaces, bgp, and system.
This walkthrough uses interfaces, which collects standard
OpenConfig interface state.
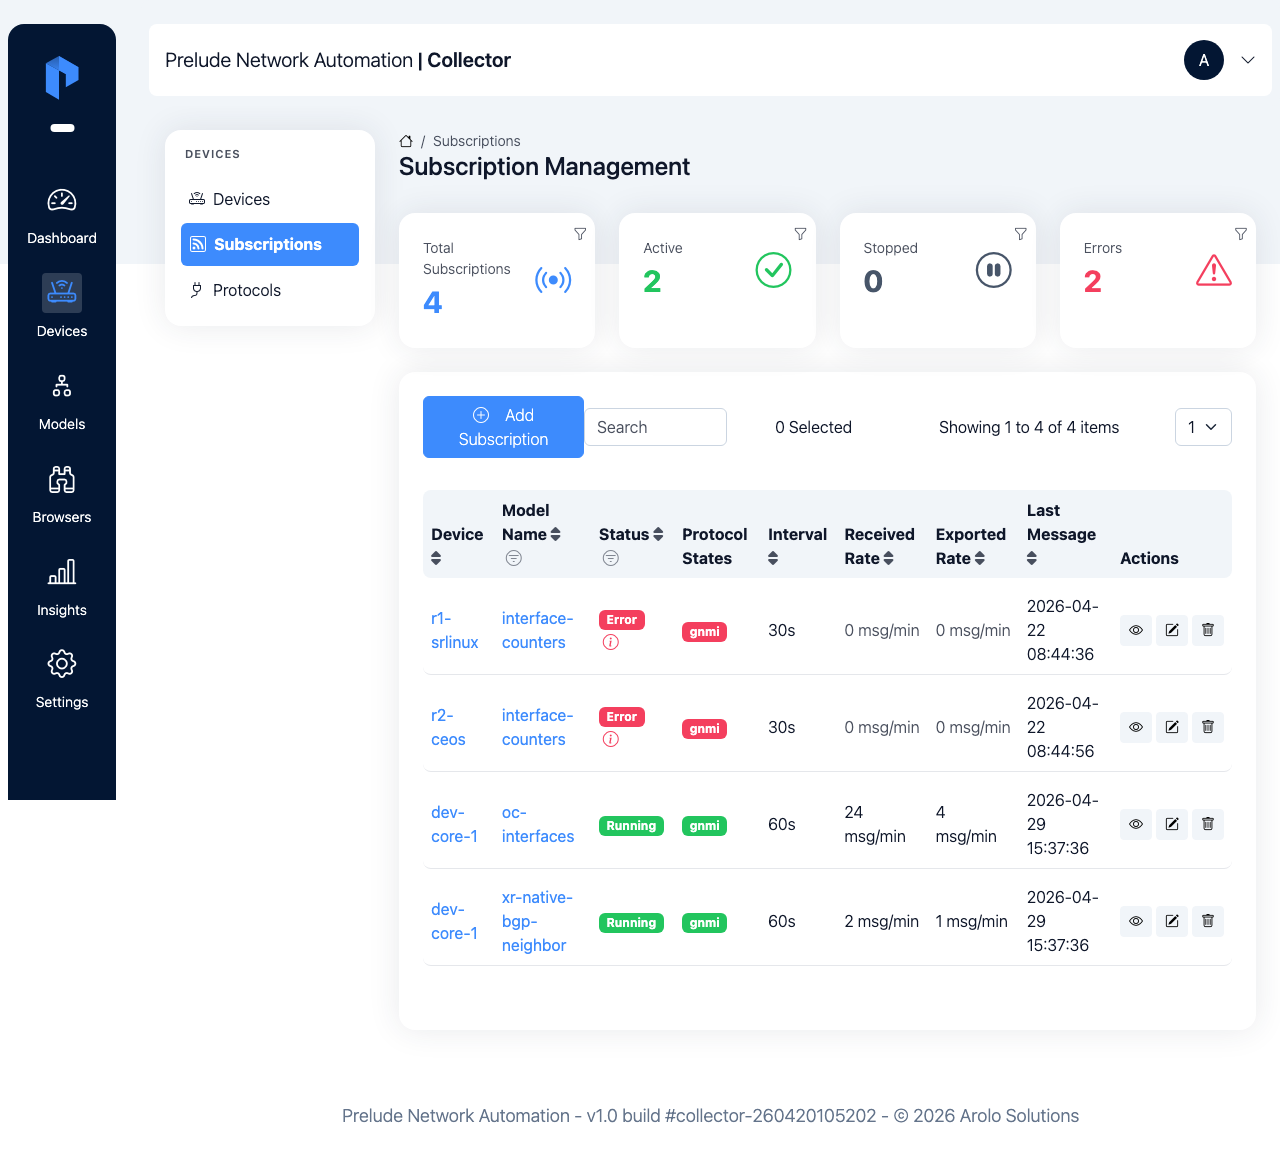
Step 5 - Create a Subscription
A Subscription binds a Device to a Model at a polling interval (in seconds):
curl -s -X POST "$BASE/api/v1/subscriptions" \
  -H "Authorization: Bearer $TOKEN" \
  -H "Content-Type: application/json" \
  -d '{
    "device_id": 1,
    "model": "interfaces",
    "interval": 30,
    "enabled": true
  }'
Bruno: 05 Subscriptions / Create subscription
Or in the UI: Subscriptions → New subscription — https://collector.example.com/subscriptions
Expected (HTTP 201):
{
  "id": 1,
  "device_id": 1,
  "model": "interfaces",
  "interval": 30,
  "enabled": true,
  "status": "starting"
}
The collector immediately starts the subscription. For gNMI
streaming, the first samples arrive within seconds. For poll-based
protocols, wait one full interval.
export SUB_ID=1
Step 6 - Read the Snapshot
A Snapshot is the latest collected state for a Device, in memory, keyed by Model. Once Step 5 has had time to run a cycle, fetch it:
curl -s "$BASE/api/v1/subscription/snapshots/$DEVICE_ID" \
  -H "Authorization: Bearer $TOKEN"
Bruno: 06 Snapshots / Get device snapshot
Or in the UI: open the subscription at
https://collector.example.com/subscriptions and view its latest snapshot.
Expected (truncated):
{
  "interfaces": [
    {
      "name": "Ethernet1",
      "admin_status": "UP",
      "oper_status": "UP",
      "in_octets": 1048576,
      "out_octets": 2097152,
      "collected_at": "2026-04-28T10:01:00Z"
    }
  ]
}
You have a successful first collection. The same data is also published to your NATS output for downstream consumers.
If something goes wrong
A few quick checks if the snapshot is empty or the subscription is not running:
- Subscription stuck in
starting: the collector cannot reach the device. Verify connectivity from the collector host to the device's gNMI port:nc -vz 192.0.2.10 6030
- Subscription
error: re-read the subscription to see the message:curl -s "$BASE/api/v1/subscriptions/$SUB_ID" \ -H "Authorization: Bearer $TOKEN"
Bruno: 05 Subscriptions / Get subscription
Common causes are wrong credentials, TLS mismatch, or a model
the device does not support.
- Snapshot is
{}: wait for one fullintervaland try again. Streaming protocols populate the snapshot as samples arrive.
Managing the Subscription
Stop, start, or restart the Subscription at any time:
curl -s -X POST "$BASE/api/v1/subscriptions/$SUB_ID/stop" \
  -H "Authorization: Bearer $TOKEN"

curl -s -X POST "$BASE/api/v1/subscriptions/$SUB_ID/start" \
  -H "Authorization: Bearer $TOKEN"

curl -s -X POST "$BASE/api/v1/subscriptions/$SUB_ID/restart" \
  -H "Authorization: Bearer $TOKEN"
Bruno: 05 Subscriptions / Stop subscription, 05 Subscriptions / Start subscription, 05 Subscriptions / Restart subscription
Next
You have a Device, a Protocol, a Subscription, and a live Snapshot. From here, Next Steps points you at the rest of the documentation - how to define your own Models, write Mappings and Transforms, send data to specific Output backends, and explore the full API.